LnRiLWdhbGxlcnkgdWx7bGlzdC1zdHlsZTpub25lO21hcmdpbjowIDAgMS41ZW0gMDtwYWRkaW5nOjB9LnRiLWdhbGxlcnlfX2NlbGx7bWFyZ2luOjAgIWltcG9ydGFudDtwb3NpdGlvbjpyZWxhdGl2ZX0udGItZ2FsbGVyeS0tZ3JpZHtkaXNwbGF5OmdyaWQ7Z3JpZC1hdXRvLXJvd3M6YXV0byAhaW1wb3J0YW50fS50Yi1nYWxsZXJ5LS1ncmlkOm5vdCgudGItZ2FsbGVyeS0tZ3JpZC0tbm9jcm9wKSAudGItYnJpY2tfX2NvbnRlbnR7aGVpZ2h0OjEwMCU7cG9zaXRpb246YWJzb2x1dGU7dG9wOjB9LnRiLWdhbGxlcnktLWdyaWQ6bm90KC50Yi1nYWxsZXJ5LS1ncmlkLS1ub2Nyb3ApIC50Yi1nYWxsZXJ5X19jZWxse2dyaWQtcm93LWVuZDp1bnNldCAhaW1wb3J0YW50O3Bvc2l0aW9uOnJlbGF0aXZlfS50Yi1nYWxsZXJ5LS1ncmlkOm5vdCgudGItZ2FsbGVyeS0tZ3JpZC0tbm9jcm9wKSAudGItZ2FsbGVyeV9fY2VsbDo6YmVmb3Jle2NvbnRlbnQ6IiI7ZGlzcGxheTppbmxpbmUtYmxvY2s7cGFkZGluZy1ib3R0b206MTAwJX0udGItZ2FsbGVyeS0tZ3JpZDpub3QoLnRiLWdhbGxlcnktLWdyaWQtLW5vY3JvcCkgLnRiLWdhbGxlcnlfX2NlbGw6Om1hcmtlcntjb250ZW50OiIifS50Yi1nYWxsZXJ5LS1ncmlkOm5vdCgudGItZ2FsbGVyeS0tZ3JpZC0tbm9jcm9wKSBpbWd7d2lkdGg6MTAwJTtoZWlnaHQ6MTAwJTstby1vYmplY3QtZml0OmNvdmVyO29iamVjdC1maXQ6Y292ZXJ9LnRiLWdhbGxlcnktLWdyaWQtLW5vY3JvcCBpbWd7aGVpZ2h0OmF1dG8gIWltcG9ydGFudDt3aWR0aDphdXRvICFpbXBvcnRhbnR9LnRiLWdhbGxlcnktLWdyaWQtLW5vY3JvcCAudGItZ2FsbGVyeV9fY2VsbHthbGlnbi1zZWxmOmVuZH0udGItZ2FsbGVyeS0tZ3JpZC0tbm9jcm9wIC50Yi1icmlja19fY29udGVudHtoZWlnaHQ6MTAwJX0udGItZ2FsbGVyeS0tY29sbGFnZXtkaXNwbGF5OmdyaWQ7Z3JpZC10ZW1wbGF0ZS1jb2x1bW5zOnJlcGVhdCgxMiwgMWZyKX0udGItZ2FsbGVyeS0tY29sbGFnZSAudGItYnJpY2tfX2NvbnRlbnR7aGVpZ2h0OjEwMCV9LnRiLWdhbGxlcnktLWNvbGxhZ2UgaW1ne2hlaWdodDoxMDAlICFpbXBvcnRhbnR9LnRiLWdhbGxlcnktLW1hc29ucnl7ZGlzcGxheTpncmlkO2dyaWQtcm93LWdhcDowO2dyaWQtYXV0by1yb3dzOjFweDtvcGFjaXR5OjB9LnRiLWdhbGxlcnktLW1hc29ucnkgLnRiLWJyaWNrX19jb250ZW50e3Bvc2l0aW9uOnJlbGF0aXZlfS50Yi1nYWxsZXJ5LS1tYXNvbnJ5IC50Yi1icmlja19fY29udGVudCBpbWcsLnRiLWdhbGxlcnktLW1hc29ucnkgLnRiLWJyaWNrX19jb250ZW50IGlmcmFtZSwudGItZ2FsbGVyeS0tbWFzb25yeSAudGItYnJpY2tfX2NvbnRlbnQgdmlkZW97LW8tb2JqZWN0LWZpdDpjb3ZlcjtvYmplY3QtZml0OmNvdmVyO3dpZHRoOjEwMCUgIWltcG9ydGFudDtkaXNwbGF5OmJsb2NrfS50Yi1nYWxsZXJ5X19jYXB0aW9ue3Bvc2l0aW9uOmFic29sdXRlO2JvdHRvbTowO3dpZHRoOjEwMCU7YmFja2dyb3VuZDpyZ2JhKDI1NSwyNTUsMjU1LDAuNik7cGFkZGluZzo1cHggMnB4O3RleHQtYWxpZ246Y2VudGVyO2NvbG9yOiMzMzN9LnRiLWdhbGxlcnlfX2NhcHRpb246ZW1wdHl7YmFja2dyb3VuZDp0cmFuc3BhcmVudCAhaW1wb3J0YW50fS50Yi1nYWxsZXJ5IC50Yi1icmlja19fY29udGVudCBmaWd1cmV7aGVpZ2h0OjEwMCV9LnRiLWdhbGxlcnkgaW1ne3dpZHRoOjEwMCU7aGVpZ2h0OjEwMCU7LW8tb2JqZWN0LWZpdDpjb3ZlcjtvYmplY3QtZml0OmNvdmVyO3ZlcnRpY2FsLWFsaWduOmJvdHRvbX0jbGVmdC1hcmVhIHVsLnRiLWdhbGxlcnl7bGlzdC1zdHlsZS10eXBlOm5vbmU7cGFkZGluZzowfSAudGItZ2FsbGVyeVtkYXRhLXRvb2xzZXQtYmxvY2tzLWdhbGxlcnk9Ijk5NjQ3YmMxMmU4NDc0NjQ4YzZkYTBjNTA4MmJlZTYxIl0gLnRiLWdhbGxlcnlfX2NhcHRpb24geyBib3R0b206IDVweDsgfSAudGItZ2FsbGVyeVtkYXRhLXRvb2xzZXQtYmxvY2tzLWdhbGxlcnk9Ijk5NjQ3YmMxMmU4NDc0NjQ4YzZkYTBjNTA4MmJlZTYxIl0gLnRiLWdhbGxlcnktLW1hc29ucnkgeyBncmlkLXRlbXBsYXRlLWNvbHVtbnM6IG1pbm1heCgwLCAxZnIpIG1pbm1heCgwLCAxZnIpIG1pbm1heCgwLCAxZnIpO2dyaWQtY29sdW1uLWdhcDogNXB4OyB9IC50Yi1nYWxsZXJ5W2RhdGEtdG9vbHNldC1ibG9ja3MtZ2FsbGVyeT0iOTk2NDdiYzEyZTg0NzQ2NDhjNmRhMGM1MDgyYmVlNjEiXSAudGItZ2FsbGVyeS0tbWFzb25yeSAudGItYnJpY2tfX2NvbnRlbnQgeyBwYWRkaW5nOiAwIDAgNXB4IDA7IH0gLnRiLWdhbGxlcnkgdWx7bGlzdC1zdHlsZTpub25lO21hcmdpbjowIDAgMS41ZW0gMDtwYWRkaW5nOjB9LnRiLWdhbGxlcnlfX2NlbGx7bWFyZ2luOjAgIWltcG9ydGFudDtwb3NpdGlvbjpyZWxhdGl2ZX0udGItZ2FsbGVyeS0tZ3JpZHtkaXNwbGF5OmdyaWQ7Z3JpZC1hdXRvLXJvd3M6YXV0byAhaW1wb3J0YW50fS50Yi1nYWxsZXJ5LS1ncmlkOm5vdCgudGItZ2FsbGVyeS0tZ3JpZC0tbm9jcm9wKSAudGItYnJpY2tfX2NvbnRlbnR7aGVpZ2h0OjEwMCU7cG9zaXRpb246YWJzb2x1dGU7dG9wOjB9LnRiLWdhbGxlcnktLWdyaWQ6bm90KC50Yi1nYWxsZXJ5LS1ncmlkLS1ub2Nyb3ApIC50Yi1nYWxsZXJ5X19jZWxse2dyaWQtcm93LWVuZDp1bnNldCAhaW1wb3J0YW50O3Bvc2l0aW9uOnJlbGF0aXZlfS50Yi1nYWxsZXJ5LS1ncmlkOm5vdCgudGItZ2FsbGVyeS0tZ3JpZC0tbm9jcm9wKSAudGItZ2FsbGVyeV9fY2VsbDo6YmVmb3Jle2NvbnRlbnQ6IiI7ZGlzcGxheTppbmxpbmUtYmxvY2s7cGFkZGluZy1ib3R0b206MTAwJX0udGItZ2FsbGVyeS0tZ3JpZDpub3QoLnRiLWdhbGxlcnktLWdyaWQtLW5vY3JvcCkgLnRiLWdhbGxlcnlfX2NlbGw6Om1hcmtlcntjb250ZW50OiIifS50Yi1nYWxsZXJ5LS1ncmlkOm5vdCgudGItZ2FsbGVyeS0tZ3JpZC0tbm9jcm9wKSBpbWd7d2lkdGg6MTAwJTtoZWlnaHQ6MTAwJTstby1vYmplY3QtZml0OmNvdmVyO29iamVjdC1maXQ6Y292ZXJ9LnRiLWdhbGxlcnktLWdyaWQtLW5vY3JvcCBpbWd7aGVpZ2h0OmF1dG8gIWltcG9ydGFudDt3aWR0aDphdXRvICFpbXBvcnRhbnR9LnRiLWdhbGxlcnktLWdyaWQtLW5vY3JvcCAudGItZ2FsbGVyeV9fY2VsbHthbGlnbi1zZWxmOmVuZH0udGItZ2FsbGVyeS0tZ3JpZC0tbm9jcm9wIC50Yi1icmlja19fY29udGVudHtoZWlnaHQ6MTAwJX0udGItZ2FsbGVyeS0tY29sbGFnZXtkaXNwbGF5OmdyaWQ7Z3JpZC10ZW1wbGF0ZS1jb2x1bW5zOnJlcGVhdCgxMiwgMWZyKX0udGItZ2FsbGVyeS0tY29sbGFnZSAudGItYnJpY2tfX2NvbnRlbnR7aGVpZ2h0OjEwMCV9LnRiLWdhbGxlcnktLWNvbGxhZ2UgaW1ne2hlaWdodDoxMDAlICFpbXBvcnRhbnR9LnRiLWdhbGxlcnktLW1hc29ucnl7ZGlzcGxheTpncmlkO2dyaWQtcm93LWdhcDowO2dyaWQtYXV0by1yb3dzOjFweDtvcGFjaXR5OjB9LnRiLWdhbGxlcnktLW1hc29ucnkgLnRiLWJyaWNrX19jb250ZW50e3Bvc2l0aW9uOnJlbGF0aXZlfS50Yi1nYWxsZXJ5LS1tYXNvbnJ5IC50Yi1icmlja19fY29udGVudCBpbWcsLnRiLWdhbGxlcnktLW1hc29ucnkgLnRiLWJyaWNrX19jb250ZW50IGlmcmFtZSwudGItZ2FsbGVyeS0tbWFzb25yeSAudGItYnJpY2tfX2NvbnRlbnQgdmlkZW97LW8tb2JqZWN0LWZpdDpjb3ZlcjtvYmplY3QtZml0OmNvdmVyO3dpZHRoOjEwMCUgIWltcG9ydGFudDtkaXNwbGF5OmJsb2NrfS50Yi1nYWxsZXJ5X19jYXB0aW9ue3Bvc2l0aW9uOmFic29sdXRlO2JvdHRvbTowO3dpZHRoOjEwMCU7YmFja2dyb3VuZDpyZ2JhKDI1NSwyNTUsMjU1LDAuNik7cGFkZGluZzo1cHggMnB4O3RleHQtYWxpZ246Y2VudGVyO2NvbG9yOiMzMzN9LnRiLWdhbGxlcnlfX2NhcHRpb246ZW1wdHl7YmFja2dyb3VuZDp0cmFuc3BhcmVudCAhaW1wb3J0YW50fS50Yi1nYWxsZXJ5IC50Yi1icmlja19fY29udGVudCBmaWd1cmV7aGVpZ2h0OjEwMCV9LnRiLWdhbGxlcnkgaW1ne3dpZHRoOjEwMCU7aGVpZ2h0OjEwMCU7LW8tb2JqZWN0LWZpdDpjb3ZlcjtvYmplY3QtZml0OmNvdmVyO3ZlcnRpY2FsLWFsaWduOmJvdHRvbX0jbGVmdC1hcmVhIHVsLnRiLWdhbGxlcnl7bGlzdC1zdHlsZS10eXBlOm5vbmU7cGFkZGluZzowfSAudGItZ2FsbGVyeVtkYXRhLXRvb2xzZXQtYmxvY2tzLWdhbGxlcnk9Ijg5ZDczZGU0NWE2Y2ZhNGYyNGQxZThkZDBjZTExYjI4Il0gLnRiLWdhbGxlcnlfX2NhcHRpb24geyBib3R0b206IDVweDsgfSAudGItZ2FsbGVyeVtkYXRhLXRvb2xzZXQtYmxvY2tzLWdhbGxlcnk9Ijg5ZDczZGU0NWE2Y2ZhNGYyNGQxZThkZDBjZTExYjI4Il0gLnRiLWdhbGxlcnktLW1hc29ucnkgeyBncmlkLXRlbXBsYXRlLWNvbHVtbnM6IG1pbm1heCgwLCAxZnIpIG1pbm1heCgwLCAxZnIpIG1pbm1heCgwLCAxZnIpO2dyaWQtY29sdW1uLWdhcDogNXB4OyB9IC50Yi1nYWxsZXJ5W2RhdGEtdG9vbHNldC1ibG9ja3MtZ2FsbGVyeT0iODlkNzNkZTQ1YTZjZmE0ZjI0ZDFlOGRkMGNlMTFiMjgiXSAudGItZ2FsbGVyeS0tbWFzb25yeSAudGItYnJpY2tfX2NvbnRlbnQgeyBwYWRkaW5nOiAwIDAgNXB4IDA7IH0gLnRiLWdhbGxlcnkgdWx7bGlzdC1zdHlsZTpub25lO21hcmdpbjowIDAgMS41ZW0gMDtwYWRkaW5nOjB9LnRiLWdhbGxlcnlfX2NlbGx7bWFyZ2luOjAgIWltcG9ydGFudDtwb3NpdGlvbjpyZWxhdGl2ZX0udGItZ2FsbGVyeS0tZ3JpZHtkaXNwbGF5OmdyaWQ7Z3JpZC1hdXRvLXJvd3M6YXV0byAhaW1wb3J0YW50fS50Yi1nYWxsZXJ5LS1ncmlkOm5vdCgudGItZ2FsbGVyeS0tZ3JpZC0tbm9jcm9wKSAudGItYnJpY2tfX2NvbnRlbnR7aGVpZ2h0OjEwMCU7cG9zaXRpb246YWJzb2x1dGU7dG9wOjB9LnRiLWdhbGxlcnktLWdyaWQ6bm90KC50Yi1nYWxsZXJ5LS1ncmlkLS1ub2Nyb3ApIC50Yi1nYWxsZXJ5X19jZWxse2dyaWQtcm93LWVuZDp1bnNldCAhaW1wb3J0YW50O3Bvc2l0aW9uOnJlbGF0aXZlfS50Yi1nYWxsZXJ5LS1ncmlkOm5vdCgudGItZ2FsbGVyeS0tZ3JpZC0tbm9jcm9wKSAudGItZ2FsbGVyeV9fY2VsbDo6YmVmb3Jle2NvbnRlbnQ6IiI7ZGlzcGxheTppbmxpbmUtYmxvY2s7cGFkZGluZy1ib3R0b206MTAwJX0udGItZ2FsbGVyeS0tZ3JpZDpub3QoLnRiLWdhbGxlcnktLWdyaWQtLW5vY3JvcCkgLnRiLWdhbGxlcnlfX2NlbGw6Om1hcmtlcntjb250ZW50OiIifS50Yi1nYWxsZXJ5LS1ncmlkOm5vdCgudGItZ2FsbGVyeS0tZ3JpZC0tbm9jcm9wKSBpbWd7d2lkdGg6MTAwJTtoZWlnaHQ6MTAwJTstby1vYmplY3QtZml0OmNvdmVyO29iamVjdC1maXQ6Y292ZXJ9LnRiLWdhbGxlcnktLWdyaWQtLW5vY3JvcCBpbWd7aGVpZ2h0OmF1dG8gIWltcG9ydGFudDt3aWR0aDphdXRvICFpbXBvcnRhbnR9LnRiLWdhbGxlcnktLWdyaWQtLW5vY3JvcCAudGItZ2FsbGVyeV9fY2VsbHthbGlnbi1zZWxmOmVuZH0udGItZ2FsbGVyeS0tZ3JpZC0tbm9jcm9wIC50Yi1icmlja19fY29udGVudHtoZWlnaHQ6MTAwJX0udGItZ2FsbGVyeS0tY29sbGFnZXtkaXNwbGF5OmdyaWQ7Z3JpZC10ZW1wbGF0ZS1jb2x1bW5zOnJlcGVhdCgxMiwgMWZyKX0udGItZ2FsbGVyeS0tY29sbGFnZSAudGItYnJpY2tfX2NvbnRlbnR7aGVpZ2h0OjEwMCV9LnRiLWdhbGxlcnktLWNvbGxhZ2UgaW1ne2hlaWdodDoxMDAlICFpbXBvcnRhbnR9LnRiLWdhbGxlcnktLW1hc29ucnl7ZGlzcGxheTpncmlkO2dyaWQtcm93LWdhcDowO2dyaWQtYXV0by1yb3dzOjFweDtvcGFjaXR5OjB9LnRiLWdhbGxlcnktLW1hc29ucnkgLnRiLWJyaWNrX19jb250ZW50e3Bvc2l0aW9uOnJlbGF0aXZlfS50Yi1nYWxsZXJ5LS1tYXNvbnJ5IC50Yi1icmlja19fY29udGVudCBpbWcsLnRiLWdhbGxlcnktLW1hc29ucnkgLnRiLWJyaWNrX19jb250ZW50IGlmcmFtZSwudGItZ2FsbGVyeS0tbWFzb25yeSAudGItYnJpY2tfX2NvbnRlbnQgdmlkZW97LW8tb2JqZWN0LWZpdDpjb3ZlcjtvYmplY3QtZml0OmNvdmVyO3dpZHRoOjEwMCUgIWltcG9ydGFudDtkaXNwbGF5OmJsb2NrfS50Yi1nYWxsZXJ5X19jYXB0aW9ue3Bvc2l0aW9uOmFic29sdXRlO2JvdHRvbTowO3dpZHRoOjEwMCU7YmFja2dyb3VuZDpyZ2JhKDI1NSwyNTUsMjU1LDAuNik7cGFkZGluZzo1cHggMnB4O3RleHQtYWxpZ246Y2VudGVyO2NvbG9yOiMzMzN9LnRiLWdhbGxlcnlfX2NhcHRpb246ZW1wdHl7YmFja2dyb3VuZDp0cmFuc3BhcmVudCAhaW1wb3J0YW50fS50Yi1nYWxsZXJ5IC50Yi1icmlja19fY29udGVudCBmaWd1cmV7aGVpZ2h0OjEwMCV9LnRiLWdhbGxlcnkgaW1ne3dpZHRoOjEwMCU7aGVpZ2h0OjEwMCU7LW8tb2JqZWN0LWZpdDpjb3ZlcjtvYmplY3QtZml0OmNvdmVyO3ZlcnRpY2FsLWFsaWduOmJvdHRvbX0jbGVmdC1hcmVhIHVsLnRiLWdhbGxlcnl7bGlzdC1zdHlsZS10eXBlOm5vbmU7cGFkZGluZzowfSAudGItZ2FsbGVyeVtkYXRhLXRvb2xzZXQtYmxvY2tzLWdhbGxlcnk9IjA1YzY5OTUyZWVhMWYxNGQ4Y2M5MGMyMWVlYWQyNzljIl0gLnRiLWdhbGxlcnlfX2NhcHRpb24geyBib3R0b206IDVweDsgfSAudGItZ2FsbGVyeVtkYXRhLXRvb2xzZXQtYmxvY2tzLWdhbGxlcnk9IjA1YzY5OTUyZWVhMWYxNGQ4Y2M5MGMyMWVlYWQyNzljIl0gLnRiLWdhbGxlcnktLW1hc29ucnkgeyBncmlkLXRlbXBsYXRlLWNvbHVtbnM6IG1pbm1heCgwLCAxZnIpIG1pbm1heCgwLCAxZnIpIG1pbm1heCgwLCAxZnIpO2dyaWQtY29sdW1uLWdhcDogNXB4OyB9IC50Yi1nYWxsZXJ5W2RhdGEtdG9vbHNldC1ibG9ja3MtZ2FsbGVyeT0iMDVjNjk5NTJlZWExZjE0ZDhjYzkwYzIxZWVhZDI3OWMiXSAudGItZ2FsbGVyeS0tbWFzb25yeSAudGItYnJpY2tfX2NvbnRlbnQgeyBwYWRkaW5nOiAwIDAgNXB4IDA7IH0gQG1lZGlhIG9ubHkgc2NyZWVuIGFuZCAobWF4LXdpZHRoOiAxMDI0cHgpIHsgLnRiLWdhbGxlcnkgdWx7bGlzdC1zdHlsZTpub25lO21hcmdpbjowIDAgMS41ZW0gMDtwYWRkaW5nOjB9LnRiLWdhbGxlcnlfX2NlbGx7bWFyZ2luOjAgIWltcG9ydGFudDtwb3NpdGlvbjpyZWxhdGl2ZX0udGItZ2FsbGVyeS0tZ3JpZHtkaXNwbGF5OmdyaWQ7Z3JpZC1hdXRvLXJvd3M6YXV0byAhaW1wb3J0YW50fS50Yi1nYWxsZXJ5LS1ncmlkOm5vdCgudGItZ2FsbGVyeS0tZ3JpZC0tbm9jcm9wKSAudGItYnJpY2tfX2NvbnRlbnR7aGVpZ2h0OjEwMCU7cG9zaXRpb246YWJzb2x1dGU7dG9wOjB9LnRiLWdhbGxlcnktLWdyaWQ6bm90KC50Yi1nYWxsZXJ5LS1ncmlkLS1ub2Nyb3ApIC50Yi1nYWxsZXJ5X19jZWxse2dyaWQtcm93LWVuZDp1bnNldCAhaW1wb3J0YW50O3Bvc2l0aW9uOnJlbGF0aXZlfS50Yi1nYWxsZXJ5LS1ncmlkOm5vdCgudGItZ2FsbGVyeS0tZ3JpZC0tbm9jcm9wKSAudGItZ2FsbGVyeV9fY2VsbDo6YmVmb3Jle2NvbnRlbnQ6IiI7ZGlzcGxheTppbmxpbmUtYmxvY2s7cGFkZGluZy1ib3R0b206MTAwJX0udGItZ2FsbGVyeS0tZ3JpZDpub3QoLnRiLWdhbGxlcnktLWdyaWQtLW5vY3JvcCkgLnRiLWdhbGxlcnlfX2NlbGw6Om1hcmtlcntjb250ZW50OiIifS50Yi1nYWxsZXJ5LS1ncmlkOm5vdCgudGItZ2FsbGVyeS0tZ3JpZC0tbm9jcm9wKSBpbWd7d2lkdGg6MTAwJTtoZWlnaHQ6MTAwJTstby1vYmplY3QtZml0OmNvdmVyO29iamVjdC1maXQ6Y292ZXJ9LnRiLWdhbGxlcnktLWdyaWQtLW5vY3JvcCBpbWd7aGVpZ2h0OmF1dG8gIWltcG9ydGFudDt3aWR0aDphdXRvICFpbXBvcnRhbnR9LnRiLWdhbGxlcnktLWdyaWQtLW5vY3JvcCAudGItZ2FsbGVyeV9fY2VsbHthbGlnbi1zZWxmOmVuZH0udGItZ2FsbGVyeS0tZ3JpZC0tbm9jcm9wIC50Yi1icmlja19fY29udGVudHtoZWlnaHQ6MTAwJX0udGItZ2FsbGVyeS0tY29sbGFnZXtkaXNwbGF5OmdyaWQ7Z3JpZC10ZW1wbGF0ZS1jb2x1bW5zOnJlcGVhdCgxMiwgMWZyKX0udGItZ2FsbGVyeS0tY29sbGFnZSAudGItYnJpY2tfX2NvbnRlbnR7aGVpZ2h0OjEwMCV9LnRiLWdhbGxlcnktLWNvbGxhZ2UgaW1ne2hlaWdodDoxMDAlICFpbXBvcnRhbnR9LnRiLWdhbGxlcnktLW1hc29ucnl7ZGlzcGxheTpncmlkO2dyaWQtcm93LWdhcDowO2dyaWQtYXV0by1yb3dzOjFweDtvcGFjaXR5OjB9LnRiLWdhbGxlcnktLW1hc29ucnkgLnRiLWJyaWNrX19jb250ZW50e3Bvc2l0aW9uOnJlbGF0aXZlfS50Yi1nYWxsZXJ5LS1tYXNvbnJ5IC50Yi1icmlja19fY29udGVudCBpbWcsLnRiLWdhbGxlcnktLW1hc29ucnkgLnRiLWJyaWNrX19jb250ZW50IGlmcmFtZSwudGItZ2FsbGVyeS0tbWFzb25yeSAudGItYnJpY2tfX2NvbnRlbnQgdmlkZW97LW8tb2JqZWN0LWZpdDpjb3ZlcjtvYmplY3QtZml0OmNvdmVyO3dpZHRoOjEwMCUgIWltcG9ydGFudDtkaXNwbGF5OmJsb2NrfS50Yi1nYWxsZXJ5X19jYXB0aW9ue3Bvc2l0aW9uOmFic29sdXRlO2JvdHRvbTowO3dpZHRoOjEwMCU7YmFja2dyb3VuZDpyZ2JhKDI1NSwyNTUsMjU1LDAuNik7cGFkZGluZzo1cHggMnB4O3RleHQtYWxpZ246Y2VudGVyO2NvbG9yOiMzMzN9LnRiLWdhbGxlcnlfX2NhcHRpb246ZW1wdHl7YmFja2dyb3VuZDp0cmFuc3BhcmVudCAhaW1wb3J0YW50fS50Yi1nYWxsZXJ5IC50Yi1icmlja19fY29udGVudCBmaWd1cmV7aGVpZ2h0OjEwMCV9LnRiLWdhbGxlcnkgaW1ne3dpZHRoOjEwMCU7aGVpZ2h0OjEwMCU7LW8tb2JqZWN0LWZpdDpjb3ZlcjtvYmplY3QtZml0OmNvdmVyO3ZlcnRpY2FsLWFsaWduOmJvdHRvbX0jbGVmdC1hcmVhIHVsLnRiLWdhbGxlcnl7bGlzdC1zdHlsZS10eXBlOm5vbmU7cGFkZGluZzowfSAudGItZ2FsbGVyeVtkYXRhLXRvb2xzZXQtYmxvY2tzLWdhbGxlcnk9Ijk5NjQ3YmMxMmU4NDc0NjQ4YzZkYTBjNTA4MmJlZTYxIl0gLnRiLWdhbGxlcnlfX2NhcHRpb24geyBib3R0b206IDVweDsgfSAudGItZ2FsbGVyeVtkYXRhLXRvb2xzZXQtYmxvY2tzLWdhbGxlcnk9Ijk5NjQ3YmMxMmU4NDc0NjQ4YzZkYTBjNTA4MmJlZTYxIl0gLnRiLWdhbGxlcnktLW1hc29ucnkgeyBncmlkLXRlbXBsYXRlLWNvbHVtbnM6IG1pbm1heCgwLCAxZnIpIG1pbm1heCgwLCAxZnIpIG1pbm1heCgwLCAxZnIpO2dyaWQtY29sdW1uLWdhcDogNXB4OyB9IC50Yi1nYWxsZXJ5W2RhdGEtdG9vbHNldC1ibG9ja3MtZ2FsbGVyeT0iOTk2NDdiYzEyZTg0NzQ2NDhjNmRhMGM1MDgyYmVlNjEiXSAudGItZ2FsbGVyeS0tbWFzb25yeSAudGItYnJpY2tfX2NvbnRlbnQgeyBwYWRkaW5nOiAwIDAgNXB4IDA7IH0gLnRiLWdhbGxlcnkgdWx7bGlzdC1zdHlsZTpub25lO21hcmdpbjowIDAgMS41ZW0gMDtwYWRkaW5nOjB9LnRiLWdhbGxlcnlfX2NlbGx7bWFyZ2luOjAgIWltcG9ydGFudDtwb3NpdGlvbjpyZWxhdGl2ZX0udGItZ2FsbGVyeS0tZ3JpZHtkaXNwbGF5OmdyaWQ7Z3JpZC1hdXRvLXJvd3M6YXV0byAhaW1wb3J0YW50fS50Yi1nYWxsZXJ5LS1ncmlkOm5vdCgudGItZ2FsbGVyeS0tZ3JpZC0tbm9jcm9wKSAudGItYnJpY2tfX2NvbnRlbnR7aGVpZ2h0OjEwMCU7cG9zaXRpb246YWJzb2x1dGU7dG9wOjB9LnRiLWdhbGxlcnktLWdyaWQ6bm90KC50Yi1nYWxsZXJ5LS1ncmlkLS1ub2Nyb3ApIC50Yi1nYWxsZXJ5X19jZWxse2dyaWQtcm93LWVuZDp1bnNldCAhaW1wb3J0YW50O3Bvc2l0aW9uOnJlbGF0aXZlfS50Yi1nYWxsZXJ5LS1ncmlkOm5vdCgudGItZ2FsbGVyeS0tZ3JpZC0tbm9jcm9wKSAudGItZ2FsbGVyeV9fY2VsbDo6YmVmb3Jle2NvbnRlbnQ6IiI7ZGlzcGxheTppbmxpbmUtYmxvY2s7cGFkZGluZy1ib3R0b206MTAwJX0udGItZ2FsbGVyeS0tZ3JpZDpub3QoLnRiLWdhbGxlcnktLWdyaWQtLW5vY3JvcCkgLnRiLWdhbGxlcnlfX2NlbGw6Om1hcmtlcntjb250ZW50OiIifS50Yi1nYWxsZXJ5LS1ncmlkOm5vdCgudGItZ2FsbGVyeS0tZ3JpZC0tbm9jcm9wKSBpbWd7d2lkdGg6MTAwJTtoZWlnaHQ6MTAwJTstby1vYmplY3QtZml0OmNvdmVyO29iamVjdC1maXQ6Y292ZXJ9LnRiLWdhbGxlcnktLWdyaWQtLW5vY3JvcCBpbWd7aGVpZ2h0OmF1dG8gIWltcG9ydGFudDt3aWR0aDphdXRvICFpbXBvcnRhbnR9LnRiLWdhbGxlcnktLWdyaWQtLW5vY3JvcCAudGItZ2FsbGVyeV9fY2VsbHthbGlnbi1zZWxmOmVuZH0udGItZ2FsbGVyeS0tZ3JpZC0tbm9jcm9wIC50Yi1icmlja19fY29udGVudHtoZWlnaHQ6MTAwJX0udGItZ2FsbGVyeS0tY29sbGFnZXtkaXNwbGF5OmdyaWQ7Z3JpZC10ZW1wbGF0ZS1jb2x1bW5zOnJlcGVhdCgxMiwgMWZyKX0udGItZ2FsbGVyeS0tY29sbGFnZSAudGItYnJpY2tfX2NvbnRlbnR7aGVpZ2h0OjEwMCV9LnRiLWdhbGxlcnktLWNvbGxhZ2UgaW1ne2hlaWdodDoxMDAlICFpbXBvcnRhbnR9LnRiLWdhbGxlcnktLW1hc29ucnl7ZGlzcGxheTpncmlkO2dyaWQtcm93LWdhcDowO2dyaWQtYXV0by1yb3dzOjFweDtvcGFjaXR5OjB9LnRiLWdhbGxlcnktLW1hc29ucnkgLnRiLWJyaWNrX19jb250ZW50e3Bvc2l0aW9uOnJlbGF0aXZlfS50Yi1nYWxsZXJ5LS1tYXNvbnJ5IC50Yi1icmlja19fY29udGVudCBpbWcsLnRiLWdhbGxlcnktLW1hc29ucnkgLnRiLWJyaWNrX19jb250ZW50IGlmcmFtZSwudGItZ2FsbGVyeS0tbWFzb25yeSAudGItYnJpY2tfX2NvbnRlbnQgdmlkZW97LW8tb2JqZWN0LWZpdDpjb3ZlcjtvYmplY3QtZml0OmNvdmVyO3dpZHRoOjEwMCUgIWltcG9ydGFudDtkaXNwbGF5OmJsb2NrfS50Yi1nYWxsZXJ5X19jYXB0aW9ue3Bvc2l0aW9uOmFic29sdXRlO2JvdHRvbTowO3dpZHRoOjEwMCU7YmFja2dyb3VuZDpyZ2JhKDI1NSwyNTUsMjU1LDAuNik7cGFkZGluZzo1cHggMnB4O3RleHQtYWxpZ246Y2VudGVyO2NvbG9yOiMzMzN9LnRiLWdhbGxlcnlfX2NhcHRpb246ZW1wdHl7YmFja2dyb3VuZDp0cmFuc3BhcmVudCAhaW1wb3J0YW50fS50Yi1nYWxsZXJ5IC50Yi1icmlja19fY29udGVudCBmaWd1cmV7aGVpZ2h0OjEwMCV9LnRiLWdhbGxlcnkgaW1ne3dpZHRoOjEwMCU7aGVpZ2h0OjEwMCU7LW8tb2JqZWN0LWZpdDpjb3ZlcjtvYmplY3QtZml0OmNvdmVyO3ZlcnRpY2FsLWFsaWduOmJvdHRvbX0jbGVmdC1hcmVhIHVsLnRiLWdhbGxlcnl7bGlzdC1zdHlsZS10eXBlOm5vbmU7cGFkZGluZzowfSAudGItZ2FsbGVyeVtkYXRhLXRvb2xzZXQtYmxvY2tzLWdhbGxlcnk9Ijg5ZDczZGU0NWE2Y2ZhNGYyNGQxZThkZDBjZTExYjI4Il0gLnRiLWdhbGxlcnlfX2NhcHRpb24geyBib3R0b206IDVweDsgfSAudGItZ2FsbGVyeVtkYXRhLXRvb2xzZXQtYmxvY2tzLWdhbGxlcnk9Ijg5ZDczZGU0NWE2Y2ZhNGYyNGQxZThkZDBjZTExYjI4Il0gLnRiLWdhbGxlcnktLW1hc29ucnkgeyBncmlkLXRlbXBsYXRlLWNvbHVtbnM6IG1pbm1heCgwLCAxZnIpIG1pbm1heCgwLCAxZnIpIG1pbm1heCgwLCAxZnIpO2dyaWQtY29sdW1uLWdhcDogNXB4OyB9IC50Yi1nYWxsZXJ5W2RhdGEtdG9vbHNldC1ibG9ja3MtZ2FsbGVyeT0iODlkNzNkZTQ1YTZjZmE0ZjI0ZDFlOGRkMGNlMTFiMjgiXSAudGItZ2FsbGVyeS0tbWFzb25yeSAudGItYnJpY2tfX2NvbnRlbnQgeyBwYWRkaW5nOiAwIDAgNXB4IDA7IH0gLnRiLWdhbGxlcnkgdWx7bGlzdC1zdHlsZTpub25lO21hcmdpbjowIDAgMS41ZW0gMDtwYWRkaW5nOjB9LnRiLWdhbGxlcnlfX2NlbGx7bWFyZ2luOjAgIWltcG9ydGFudDtwb3NpdGlvbjpyZWxhdGl2ZX0udGItZ2FsbGVyeS0tZ3JpZHtkaXNwbGF5OmdyaWQ7Z3JpZC1hdXRvLXJvd3M6YXV0byAhaW1wb3J0YW50fS50Yi1nYWxsZXJ5LS1ncmlkOm5vdCgudGItZ2FsbGVyeS0tZ3JpZC0tbm9jcm9wKSAudGItYnJpY2tfX2NvbnRlbnR7aGVpZ2h0OjEwMCU7cG9zaXRpb246YWJzb2x1dGU7dG9wOjB9LnRiLWdhbGxlcnktLWdyaWQ6bm90KC50Yi1nYWxsZXJ5LS1ncmlkLS1ub2Nyb3ApIC50Yi1nYWxsZXJ5X19jZWxse2dyaWQtcm93LWVuZDp1bnNldCAhaW1wb3J0YW50O3Bvc2l0aW9uOnJlbGF0aXZlfS50Yi1nYWxsZXJ5LS1ncmlkOm5vdCgudGItZ2FsbGVyeS0tZ3JpZC0tbm9jcm9wKSAudGItZ2FsbGVyeV9fY2VsbDo6YmVmb3Jle2NvbnRlbnQ6IiI7ZGlzcGxheTppbmxpbmUtYmxvY2s7cGFkZGluZy1ib3R0b206MTAwJX0udGItZ2FsbGVyeS0tZ3JpZDpub3QoLnRiLWdhbGxlcnktLWdyaWQtLW5vY3JvcCkgLnRiLWdhbGxlcnlfX2NlbGw6Om1hcmtlcntjb250ZW50OiIifS50Yi1nYWxsZXJ5LS1ncmlkOm5vdCgudGItZ2FsbGVyeS0tZ3JpZC0tbm9jcm9wKSBpbWd7d2lkdGg6MTAwJTtoZWlnaHQ6MTAwJTstby1vYmplY3QtZml0OmNvdmVyO29iamVjdC1maXQ6Y292ZXJ9LnRiLWdhbGxlcnktLWdyaWQtLW5vY3JvcCBpbWd7aGVpZ2h0OmF1dG8gIWltcG9ydGFudDt3aWR0aDphdXRvICFpbXBvcnRhbnR9LnRiLWdhbGxlcnktLWdyaWQtLW5vY3JvcCAudGItZ2FsbGVyeV9fY2VsbHthbGlnbi1zZWxmOmVuZH0udGItZ2FsbGVyeS0tZ3JpZC0tbm9jcm9wIC50Yi1icmlja19fY29udGVudHtoZWlnaHQ6MTAwJX0udGItZ2FsbGVyeS0tY29sbGFnZXtkaXNwbGF5OmdyaWQ7Z3JpZC10ZW1wbGF0ZS1jb2x1bW5zOnJlcGVhdCgxMiwgMWZyKX0udGItZ2FsbGVyeS0tY29sbGFnZSAudGItYnJpY2tfX2NvbnRlbnR7aGVpZ2h0OjEwMCV9LnRiLWdhbGxlcnktLWNvbGxhZ2UgaW1ne2hlaWdodDoxMDAlICFpbXBvcnRhbnR9LnRiLWdhbGxlcnktLW1hc29ucnl7ZGlzcGxheTpncmlkO2dyaWQtcm93LWdhcDowO2dyaWQtYXV0by1yb3dzOjFweDtvcGFjaXR5OjB9LnRiLWdhbGxlcnktLW1hc29ucnkgLnRiLWJyaWNrX19jb250ZW50e3Bvc2l0aW9uOnJlbGF0aXZlfS50Yi1nYWxsZXJ5LS1tYXNvbnJ5IC50Yi1icmlja19fY29udGVudCBpbWcsLnRiLWdhbGxlcnktLW1hc29ucnkgLnRiLWJyaWNrX19jb250ZW50IGlmcmFtZSwudGItZ2FsbGVyeS0tbWFzb25yeSAudGItYnJpY2tfX2NvbnRlbnQgdmlkZW97LW8tb2JqZWN0LWZpdDpjb3ZlcjtvYmplY3QtZml0OmNvdmVyO3dpZHRoOjEwMCUgIWltcG9ydGFudDtkaXNwbGF5OmJsb2NrfS50Yi1nYWxsZXJ5X19jYXB0aW9ue3Bvc2l0aW9uOmFic29sdXRlO2JvdHRvbTowO3dpZHRoOjEwMCU7YmFja2dyb3VuZDpyZ2JhKDI1NSwyNTUsMjU1LDAuNik7cGFkZGluZzo1cHggMnB4O3RleHQtYWxpZ246Y2VudGVyO2NvbG9yOiMzMzN9LnRiLWdhbGxlcnlfX2NhcHRpb246ZW1wdHl7YmFja2dyb3VuZDp0cmFuc3BhcmVudCAhaW1wb3J0YW50fS50Yi1nYWxsZXJ5IC50Yi1icmlja19fY29udGVudCBmaWd1cmV7aGVpZ2h0OjEwMCV9LnRiLWdhbGxlcnkgaW1ne3dpZHRoOjEwMCU7aGVpZ2h0OjEwMCU7LW8tb2JqZWN0LWZpdDpjb3ZlcjtvYmplY3QtZml0OmNvdmVyO3ZlcnRpY2FsLWFsaWduOmJvdHRvbX0jbGVmdC1hcmVhIHVsLnRiLWdhbGxlcnl7bGlzdC1zdHlsZS10eXBlOm5vbmU7cGFkZGluZzowfSAudGItZ2FsbGVyeVtkYXRhLXRvb2xzZXQtYmxvY2tzLWdhbGxlcnk9IjA1YzY5OTUyZWVhMWYxNGQ4Y2M5MGMyMWVlYWQyNzljIl0gLnRiLWdhbGxlcnlfX2NhcHRpb24geyBib3R0b206IDVweDsgfSAudGItZ2FsbGVyeVtkYXRhLXRvb2xzZXQtYmxvY2tzLWdhbGxlcnk9IjA1YzY5OTUyZWVhMWYxNGQ4Y2M5MGMyMWVlYWQyNzljIl0gLnRiLWdhbGxlcnktLW1hc29ucnkgeyBncmlkLXRlbXBsYXRlLWNvbHVtbnM6IG1pbm1heCgwLCAxZnIpIG1pbm1heCgwLCAxZnIpIG1pbm1heCgwLCAxZnIpO2dyaWQtY29sdW1uLWdhcDogNXB4OyB9IC50Yi1nYWxsZXJ5W2RhdGEtdG9vbHNldC1ibG9ja3MtZ2FsbGVyeT0iMDVjNjk5NTJlZWExZjE0ZDhjYzkwYzIxZWVhZDI3OWMiXSAudGItZ2FsbGVyeS0tbWFzb25yeSAudGItYnJpY2tfX2NvbnRlbnQgeyBwYWRkaW5nOiAwIDAgNXB4IDA7IH0gIH0gQG1lZGlhIG9ubHkgc2NyZWVuIGFuZCAobWF4LXdpZHRoOiA3NjhweCkgeyAudGItZ2FsbGVyeSB1bHtsaXN0LXN0eWxlOm5vbmU7bWFyZ2luOjAgMCAxLjVlbSAwO3BhZGRpbmc6MH0udGItZ2FsbGVyeV9fY2VsbHttYXJnaW46MCAhaW1wb3J0YW50O3Bvc2l0aW9uOnJlbGF0aXZlfS50Yi1nYWxsZXJ5LS1ncmlke2Rpc3BsYXk6Z3JpZDtncmlkLWF1dG8tcm93czphdXRvICFpbXBvcnRhbnR9LnRiLWdhbGxlcnktLWdyaWQ6bm90KC50Yi1nYWxsZXJ5LS1ncmlkLS1ub2Nyb3ApIC50Yi1icmlja19fY29udGVudHtoZWlnaHQ6MTAwJTtwb3NpdGlvbjphYnNvbHV0ZTt0b3A6MH0udGItZ2FsbGVyeS0tZ3JpZDpub3QoLnRiLWdhbGxlcnktLWdyaWQtLW5vY3JvcCkgLnRiLWdhbGxlcnlfX2NlbGx7Z3JpZC1yb3ctZW5kOnVuc2V0ICFpbXBvcnRhbnQ7cG9zaXRpb246cmVsYXRpdmV9LnRiLWdhbGxlcnktLWdyaWQ6bm90KC50Yi1nYWxsZXJ5LS1ncmlkLS1ub2Nyb3ApIC50Yi1nYWxsZXJ5X19jZWxsOjpiZWZvcmV7Y29udGVudDoiIjtkaXNwbGF5OmlubGluZS1ibG9jaztwYWRkaW5nLWJvdHRvbToxMDAlfS50Yi1nYWxsZXJ5LS1ncmlkOm5vdCgudGItZ2FsbGVyeS0tZ3JpZC0tbm9jcm9wKSAudGItZ2FsbGVyeV9fY2VsbDo6bWFya2Vye2NvbnRlbnQ6IiJ9LnRiLWdhbGxlcnktLWdyaWQ6bm90KC50Yi1nYWxsZXJ5LS1ncmlkLS1ub2Nyb3ApIGltZ3t3aWR0aDoxMDAlO2hlaWdodDoxMDAlOy1vLW9iamVjdC1maXQ6Y292ZXI7b2JqZWN0LWZpdDpjb3Zlcn0udGItZ2FsbGVyeS0tZ3JpZC0tbm9jcm9wIGltZ3toZWlnaHQ6YXV0byAhaW1wb3J0YW50O3dpZHRoOmF1dG8gIWltcG9ydGFudH0udGItZ2FsbGVyeS0tZ3JpZC0tbm9jcm9wIC50Yi1nYWxsZXJ5X19jZWxse2FsaWduLXNlbGY6ZW5kfS50Yi1nYWxsZXJ5LS1ncmlkLS1ub2Nyb3AgLnRiLWJyaWNrX19jb250ZW50e2hlaWdodDoxMDAlfS50Yi1nYWxsZXJ5LS1jb2xsYWdle2Rpc3BsYXk6Z3JpZDtncmlkLXRlbXBsYXRlLWNvbHVtbnM6cmVwZWF0KDEyLCAxZnIpfS50Yi1nYWxsZXJ5LS1jb2xsYWdlIC50Yi1icmlja19fY29udGVudHtoZWlnaHQ6MTAwJX0udGItZ2FsbGVyeS0tY29sbGFnZSBpbWd7aGVpZ2h0OjEwMCUgIWltcG9ydGFudH0udGItZ2FsbGVyeS0tbWFzb25yeXtkaXNwbGF5OmdyaWQ7Z3JpZC1yb3ctZ2FwOjA7Z3JpZC1hdXRvLXJvd3M6MXB4O29wYWNpdHk6MH0udGItZ2FsbGVyeS0tbWFzb25yeSAudGItYnJpY2tfX2NvbnRlbnR7cG9zaXRpb246cmVsYXRpdmV9LnRiLWdhbGxlcnktLW1hc29ucnkgLnRiLWJyaWNrX19jb250ZW50IGltZywudGItZ2FsbGVyeS0tbWFzb25yeSAudGItYnJpY2tfX2NvbnRlbnQgaWZyYW1lLC50Yi1nYWxsZXJ5LS1tYXNvbnJ5IC50Yi1icmlja19fY29udGVudCB2aWRlb3stby1vYmplY3QtZml0OmNvdmVyO29iamVjdC1maXQ6Y292ZXI7d2lkdGg6MTAwJSAhaW1wb3J0YW50O2Rpc3BsYXk6YmxvY2t9LnRiLWdhbGxlcnlfX2NhcHRpb257cG9zaXRpb246YWJzb2x1dGU7Ym90dG9tOjA7d2lkdGg6MTAwJTtiYWNrZ3JvdW5kOnJnYmEoMjU1LDI1NSwyNTUsMC42KTtwYWRkaW5nOjVweCAycHg7dGV4dC1hbGlnbjpjZW50ZXI7Y29sb3I6IzMzM30udGItZ2FsbGVyeV9fY2FwdGlvbjplbXB0eXtiYWNrZ3JvdW5kOnRyYW5zcGFyZW50ICFpbXBvcnRhbnR9LnRiLWdhbGxlcnkgLnRiLWJyaWNrX19jb250ZW50IGZpZ3VyZXtoZWlnaHQ6MTAwJX0udGItZ2FsbGVyeSBpbWd7d2lkdGg6MTAwJTtoZWlnaHQ6MTAwJTstby1vYmplY3QtZml0OmNvdmVyO29iamVjdC1maXQ6Y292ZXI7dmVydGljYWwtYWxpZ246Ym90dG9tfSNsZWZ0LWFyZWEgdWwudGItZ2FsbGVyeXtsaXN0LXN0eWxlLXR5cGU6bm9uZTtwYWRkaW5nOjB9IC50Yi1nYWxsZXJ5W2RhdGEtdG9vbHNldC1ibG9ja3MtZ2FsbGVyeT0iOTk2NDdiYzEyZTg0NzQ2NDhjNmRhMGM1MDgyYmVlNjEiXSAudGItZ2FsbGVyeV9fY2FwdGlvbiB7IGZvbnQtc2l6ZTogMTJweDtsaW5lLWhlaWdodDogMTJweDtib3R0b206IDVweDsgfSAudGItZ2FsbGVyeVtkYXRhLXRvb2xzZXQtYmxvY2tzLWdhbGxlcnk9Ijk5NjQ3YmMxMmU4NDc0NjQ4YzZkYTBjNTA4MmJlZTYxIl0gLnRiLWdhbGxlcnktLW1hc29ucnkgeyBncmlkLXRlbXBsYXRlLWNvbHVtbnM6IG1pbm1heCgwLCAxZnIpIG1pbm1heCgwLCAxZnIpO2dyaWQtY29sdW1uLWdhcDogNXB4OyB9IC50Yi1nYWxsZXJ5W2RhdGEtdG9vbHNldC1ibG9ja3MtZ2FsbGVyeT0iOTk2NDdiYzEyZTg0NzQ2NDhjNmRhMGM1MDgyYmVlNjEiXSAudGItZ2FsbGVyeS0tbWFzb25yeSAudGItYnJpY2tfX2NvbnRlbnQgeyBwYWRkaW5nOiAwIDAgNXB4IDA7IH0gLnRiLWdhbGxlcnkgdWx7bGlzdC1zdHlsZTpub25lO21hcmdpbjowIDAgMS41ZW0gMDtwYWRkaW5nOjB9LnRiLWdhbGxlcnlfX2NlbGx7bWFyZ2luOjAgIWltcG9ydGFudDtwb3NpdGlvbjpyZWxhdGl2ZX0udGItZ2FsbGVyeS0tZ3JpZHtkaXNwbGF5OmdyaWQ7Z3JpZC1hdXRvLXJvd3M6YXV0byAhaW1wb3J0YW50fS50Yi1nYWxsZXJ5LS1ncmlkOm5vdCgudGItZ2FsbGVyeS0tZ3JpZC0tbm9jcm9wKSAudGItYnJpY2tfX2NvbnRlbnR7aGVpZ2h0OjEwMCU7cG9zaXRpb246YWJzb2x1dGU7dG9wOjB9LnRiLWdhbGxlcnktLWdyaWQ6bm90KC50Yi1nYWxsZXJ5LS1ncmlkLS1ub2Nyb3ApIC50Yi1nYWxsZXJ5X19jZWxse2dyaWQtcm93LWVuZDp1bnNldCAhaW1wb3J0YW50O3Bvc2l0aW9uOnJlbGF0aXZlfS50Yi1nYWxsZXJ5LS1ncmlkOm5vdCgudGItZ2FsbGVyeS0tZ3JpZC0tbm9jcm9wKSAudGItZ2FsbGVyeV9fY2VsbDo6YmVmb3Jle2NvbnRlbnQ6IiI7ZGlzcGxheTppbmxpbmUtYmxvY2s7cGFkZGluZy1ib3R0b206MTAwJX0udGItZ2FsbGVyeS0tZ3JpZDpub3QoLnRiLWdhbGxlcnktLWdyaWQtLW5vY3JvcCkgLnRiLWdhbGxlcnlfX2NlbGw6Om1hcmtlcntjb250ZW50OiIifS50Yi1nYWxsZXJ5LS1ncmlkOm5vdCgudGItZ2FsbGVyeS0tZ3JpZC0tbm9jcm9wKSBpbWd7d2lkdGg6MTAwJTtoZWlnaHQ6MTAwJTstby1vYmplY3QtZml0OmNvdmVyO29iamVjdC1maXQ6Y292ZXJ9LnRiLWdhbGxlcnktLWdyaWQtLW5vY3JvcCBpbWd7aGVpZ2h0OmF1dG8gIWltcG9ydGFudDt3aWR0aDphdXRvICFpbXBvcnRhbnR9LnRiLWdhbGxlcnktLWdyaWQtLW5vY3JvcCAudGItZ2FsbGVyeV9fY2VsbHthbGlnbi1zZWxmOmVuZH0udGItZ2FsbGVyeS0tZ3JpZC0tbm9jcm9wIC50Yi1icmlja19fY29udGVudHtoZWlnaHQ6MTAwJX0udGItZ2FsbGVyeS0tY29sbGFnZXtkaXNwbGF5OmdyaWQ7Z3JpZC10ZW1wbGF0ZS1jb2x1bW5zOnJlcGVhdCgxMiwgMWZyKX0udGItZ2FsbGVyeS0tY29sbGFnZSAudGItYnJpY2tfX2NvbnRlbnR7aGVpZ2h0OjEwMCV9LnRiLWdhbGxlcnktLWNvbGxhZ2UgaW1ne2hlaWdodDoxMDAlICFpbXBvcnRhbnR9LnRiLWdhbGxlcnktLW1hc29ucnl7ZGlzcGxheTpncmlkO2dyaWQtcm93LWdhcDowO2dyaWQtYXV0by1yb3dzOjFweDtvcGFjaXR5OjB9LnRiLWdhbGxlcnktLW1hc29ucnkgLnRiLWJyaWNrX19jb250ZW50e3Bvc2l0aW9uOnJlbGF0aXZlfS50Yi1nYWxsZXJ5LS1tYXNvbnJ5IC50Yi1icmlja19fY29udGVudCBpbWcsLnRiLWdhbGxlcnktLW1hc29ucnkgLnRiLWJyaWNrX19jb250ZW50IGlmcmFtZSwudGItZ2FsbGVyeS0tbWFzb25yeSAudGItYnJpY2tfX2NvbnRlbnQgdmlkZW97LW8tb2JqZWN0LWZpdDpjb3ZlcjtvYmplY3QtZml0OmNvdmVyO3dpZHRoOjEwMCUgIWltcG9ydGFudDtkaXNwbGF5OmJsb2NrfS50Yi1nYWxsZXJ5X19jYXB0aW9ue3Bvc2l0aW9uOmFic29sdXRlO2JvdHRvbTowO3dpZHRoOjEwMCU7YmFja2dyb3VuZDpyZ2JhKDI1NSwyNTUsMjU1LDAuNik7cGFkZGluZzo1cHggMnB4O3RleHQtYWxpZ246Y2VudGVyO2NvbG9yOiMzMzN9LnRiLWdhbGxlcnlfX2NhcHRpb246ZW1wdHl7YmFja2dyb3VuZDp0cmFuc3BhcmVudCAhaW1wb3J0YW50fS50Yi1nYWxsZXJ5IC50Yi1icmlja19fY29udGVudCBmaWd1cmV7aGVpZ2h0OjEwMCV9LnRiLWdhbGxlcnkgaW1ne3dpZHRoOjEwMCU7aGVpZ2h0OjEwMCU7LW8tb2JqZWN0LWZpdDpjb3ZlcjtvYmplY3QtZml0OmNvdmVyO3ZlcnRpY2FsLWFsaWduOmJvdHRvbX0jbGVmdC1hcmVhIHVsLnRiLWdhbGxlcnl7bGlzdC1zdHlsZS10eXBlOm5vbmU7cGFkZGluZzowfSAudGItZ2FsbGVyeVtkYXRhLXRvb2xzZXQtYmxvY2tzLWdhbGxlcnk9Ijg5ZDczZGU0NWE2Y2ZhNGYyNGQxZThkZDBjZTExYjI4Il0gLnRiLWdhbGxlcnlfX2NhcHRpb24geyBmb250LXNpemU6IDEycHg7bGluZS1oZWlnaHQ6IDEycHg7Ym90dG9tOiA1cHg7IH0gLnRiLWdhbGxlcnlbZGF0YS10b29sc2V0LWJsb2Nrcy1nYWxsZXJ5PSI4OWQ3M2RlNDVhNmNmYTRmMjRkMWU4ZGQwY2UxMWIyOCJdIC50Yi1nYWxsZXJ5LS1tYXNvbnJ5IHsgZ3JpZC10ZW1wbGF0ZS1jb2x1bW5zOiBtaW5tYXgoMCwgMWZyKSBtaW5tYXgoMCwgMWZyKTtncmlkLWNvbHVtbi1nYXA6IDVweDsgfSAudGItZ2FsbGVyeVtkYXRhLXRvb2xzZXQtYmxvY2tzLWdhbGxlcnk9Ijg5ZDczZGU0NWE2Y2ZhNGYyNGQxZThkZDBjZTExYjI4Il0gLnRiLWdhbGxlcnktLW1hc29ucnkgLnRiLWJyaWNrX19jb250ZW50IHsgcGFkZGluZzogMCAwIDVweCAwOyB9IC50Yi1nYWxsZXJ5IHVse2xpc3Qtc3R5bGU6bm9uZTttYXJnaW46MCAwIDEuNWVtIDA7cGFkZGluZzowfS50Yi1nYWxsZXJ5X19jZWxse21hcmdpbjowICFpbXBvcnRhbnQ7cG9zaXRpb246cmVsYXRpdmV9LnRiLWdhbGxlcnktLWdyaWR7ZGlzcGxheTpncmlkO2dyaWQtYXV0by1yb3dzOmF1dG8gIWltcG9ydGFudH0udGItZ2FsbGVyeS0tZ3JpZDpub3QoLnRiLWdhbGxlcnktLWdyaWQtLW5vY3JvcCkgLnRiLWJyaWNrX19jb250ZW50e2hlaWdodDoxMDAlO3Bvc2l0aW9uOmFic29sdXRlO3RvcDowfS50Yi1nYWxsZXJ5LS1ncmlkOm5vdCgudGItZ2FsbGVyeS0tZ3JpZC0tbm9jcm9wKSAudGItZ2FsbGVyeV9fY2VsbHtncmlkLXJvdy1lbmQ6dW5zZXQgIWltcG9ydGFudDtwb3NpdGlvbjpyZWxhdGl2ZX0udGItZ2FsbGVyeS0tZ3JpZDpub3QoLnRiLWdhbGxlcnktLWdyaWQtLW5vY3JvcCkgLnRiLWdhbGxlcnlfX2NlbGw6OmJlZm9yZXtjb250ZW50OiIiO2Rpc3BsYXk6aW5saW5lLWJsb2NrO3BhZGRpbmctYm90dG9tOjEwMCV9LnRiLWdhbGxlcnktLWdyaWQ6bm90KC50Yi1nYWxsZXJ5LS1ncmlkLS1ub2Nyb3ApIC50Yi1nYWxsZXJ5X19jZWxsOjptYXJrZXJ7Y29udGVudDoiIn0udGItZ2FsbGVyeS0tZ3JpZDpub3QoLnRiLWdhbGxlcnktLWdyaWQtLW5vY3JvcCkgaW1ne3dpZHRoOjEwMCU7aGVpZ2h0OjEwMCU7LW8tb2JqZWN0LWZpdDpjb3ZlcjtvYmplY3QtZml0OmNvdmVyfS50Yi1nYWxsZXJ5LS1ncmlkLS1ub2Nyb3AgaW1ne2hlaWdodDphdXRvICFpbXBvcnRhbnQ7d2lkdGg6YXV0byAhaW1wb3J0YW50fS50Yi1nYWxsZXJ5LS1ncmlkLS1ub2Nyb3AgLnRiLWdhbGxlcnlfX2NlbGx7YWxpZ24tc2VsZjplbmR9LnRiLWdhbGxlcnktLWdyaWQtLW5vY3JvcCAudGItYnJpY2tfX2NvbnRlbnR7aGVpZ2h0OjEwMCV9LnRiLWdhbGxlcnktLWNvbGxhZ2V7ZGlzcGxheTpncmlkO2dyaWQtdGVtcGxhdGUtY29sdW1uczpyZXBlYXQoMTIsIDFmcil9LnRiLWdhbGxlcnktLWNvbGxhZ2UgLnRiLWJyaWNrX19jb250ZW50e2hlaWdodDoxMDAlfS50Yi1nYWxsZXJ5LS1jb2xsYWdlIGltZ3toZWlnaHQ6MTAwJSAhaW1wb3J0YW50fS50Yi1nYWxsZXJ5LS1tYXNvbnJ5e2Rpc3BsYXk6Z3JpZDtncmlkLXJvdy1nYXA6MDtncmlkLWF1dG8tcm93czoxcHg7b3BhY2l0eTowfS50Yi1nYWxsZXJ5LS1tYXNvbnJ5IC50Yi1icmlja19fY29udGVudHtwb3NpdGlvbjpyZWxhdGl2ZX0udGItZ2FsbGVyeS0tbWFzb25yeSAudGItYnJpY2tfX2NvbnRlbnQgaW1nLC50Yi1nYWxsZXJ5LS1tYXNvbnJ5IC50Yi1icmlja19fY29udGVudCBpZnJhbWUsLnRiLWdhbGxlcnktLW1hc29ucnkgLnRiLWJyaWNrX19jb250ZW50IHZpZGVvey1vLW9iamVjdC1maXQ6Y292ZXI7b2JqZWN0LWZpdDpjb3Zlcjt3aWR0aDoxMDAlICFpbXBvcnRhbnQ7ZGlzcGxheTpibG9ja30udGItZ2FsbGVyeV9fY2FwdGlvbntwb3NpdGlvbjphYnNvbHV0ZTtib3R0b206MDt3aWR0aDoxMDAlO2JhY2tncm91bmQ6cmdiYSgyNTUsMjU1LDI1NSwwLjYpO3BhZGRpbmc6NXB4IDJweDt0ZXh0LWFsaWduOmNlbnRlcjtjb2xvcjojMzMzfS50Yi1nYWxsZXJ5X19jYXB0aW9uOmVtcHR5e2JhY2tncm91bmQ6dHJhbnNwYXJlbnQgIWltcG9ydGFudH0udGItZ2FsbGVyeSAudGItYnJpY2tfX2NvbnRlbnQgZmlndXJle2hlaWdodDoxMDAlfS50Yi1nYWxsZXJ5IGltZ3t3aWR0aDoxMDAlO2hlaWdodDoxMDAlOy1vLW9iamVjdC1maXQ6Y292ZXI7b2JqZWN0LWZpdDpjb3Zlcjt2ZXJ0aWNhbC1hbGlnbjpib3R0b219I2xlZnQtYXJlYSB1bC50Yi1nYWxsZXJ5e2xpc3Qtc3R5bGUtdHlwZTpub25lO3BhZGRpbmc6MH0gLnRiLWdhbGxlcnlbZGF0YS10b29sc2V0LWJsb2Nrcy1nYWxsZXJ5PSIwNWM2OTk1MmVlYTFmMTRkOGNjOTBjMjFlZWFkMjc5YyJdIC50Yi1nYWxsZXJ5X19jYXB0aW9uIHsgZm9udC1zaXplOiAxMnB4O2xpbmUtaGVpZ2h0OiAxMnB4O2JvdHRvbTogNXB4OyB9IC50Yi1nYWxsZXJ5W2RhdGEtdG9vbHNldC1ibG9ja3MtZ2FsbGVyeT0iMDVjNjk5NTJlZWExZjE0ZDhjYzkwYzIxZWVhZDI3OWMiXSAudGItZ2FsbGVyeS0tbWFzb25yeSB7IGdyaWQtdGVtcGxhdGUtY29sdW1uczogbWlubWF4KDAsIDFmcikgbWlubWF4KDAsIDFmcik7Z3JpZC1jb2x1bW4tZ2FwOiA1cHg7IH0gLnRiLWdhbGxlcnlbZGF0YS10b29sc2V0LWJsb2Nrcy1nYWxsZXJ5PSIwNWM2OTk1MmVlYTFmMTRkOGNjOTBjMjFlZWFkMjc5YyJdIC50Yi1nYWxsZXJ5LS1tYXNvbnJ5IC50Yi1icmlja19fY29udGVudCB7IHBhZGRpbmc6IDAgMCA1cHggMDsgfSAgfSA=
VIDEO
This video shows examples of the different ways to install and grout natural thin stone veneer choosing grout color, size, offset and even overgrouting. David Croteau of Stoneyard.com explains grouting options for dry, standard, and wide joints. Thin Stone Veneer is available in Mosaic , Ledgestone , Ashlar , Square & Rectangular, Round and Stacked Stone shapes in both Flats and Corners . Read about Mortar Joint Options and How to Install Thin Stone Veneer .
When it comes to installing thin stone veneer, one of the aspects that can make the biggest effect aesthetically is the last step in the process, jointing. There are many different ways to fit natural thin stones together, each providing a different look and feel. Below are a few of the different techniques used by various masons.
#1 | Dry-Laid, Recessed, or Paper Thin Mortar Joints
Mortar is recessed approximately 1/2 inch from the face of stone. Mortar can be raked out or installed without pointing. The dry-laid appearance can have nice “shadow lines.”
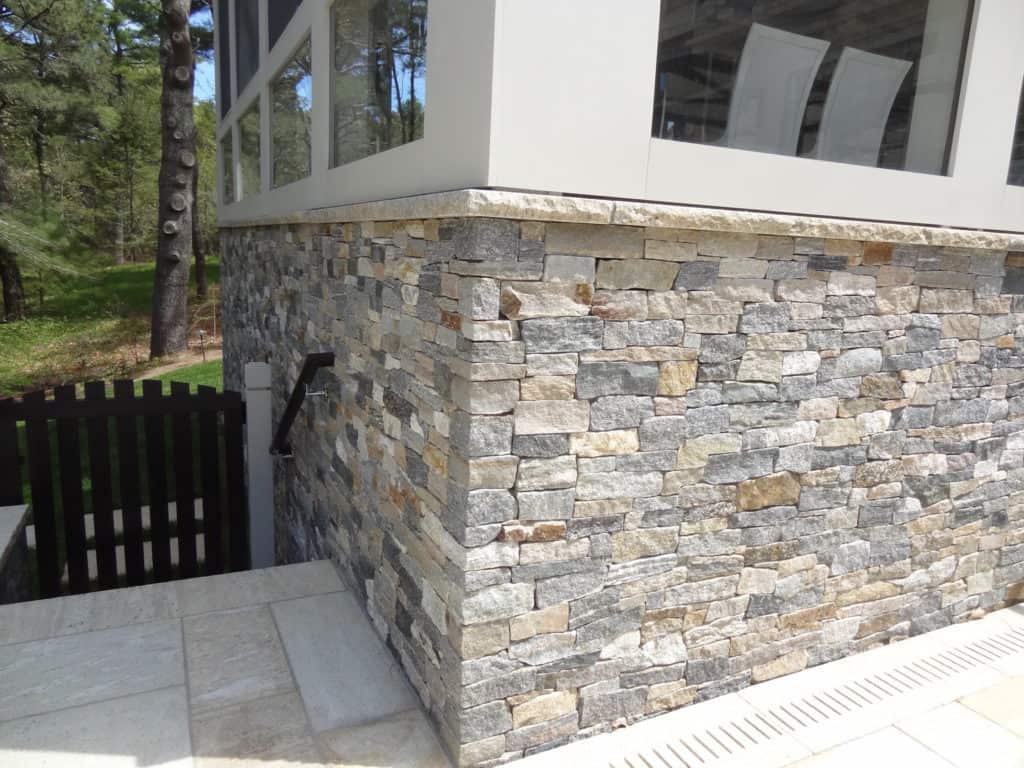
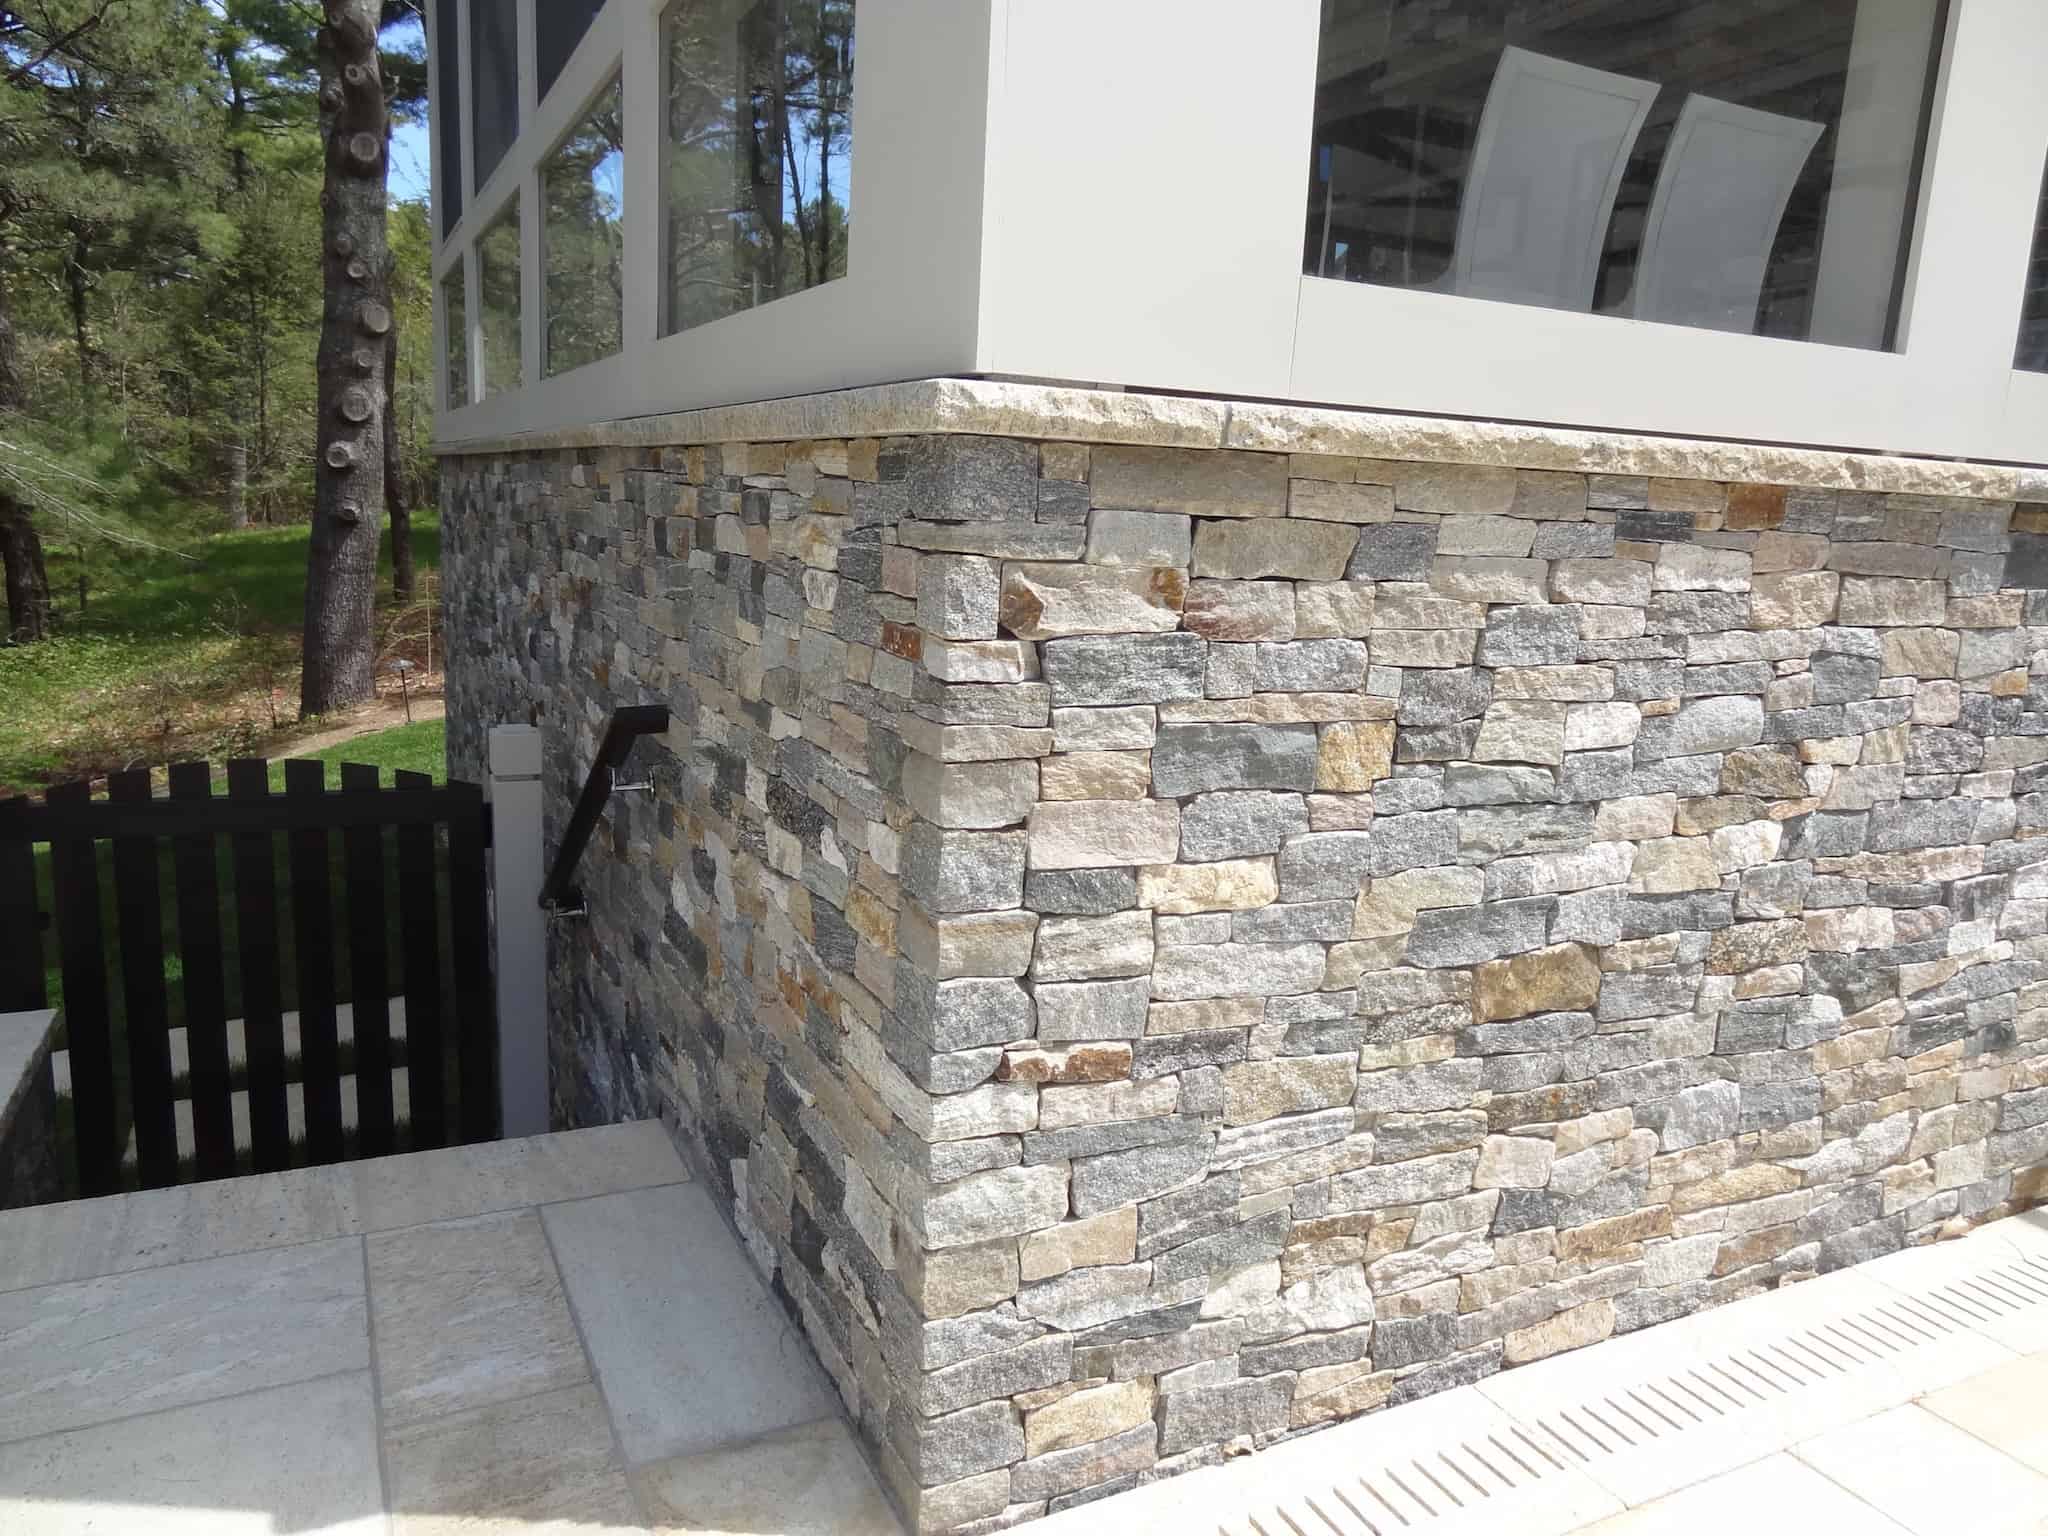
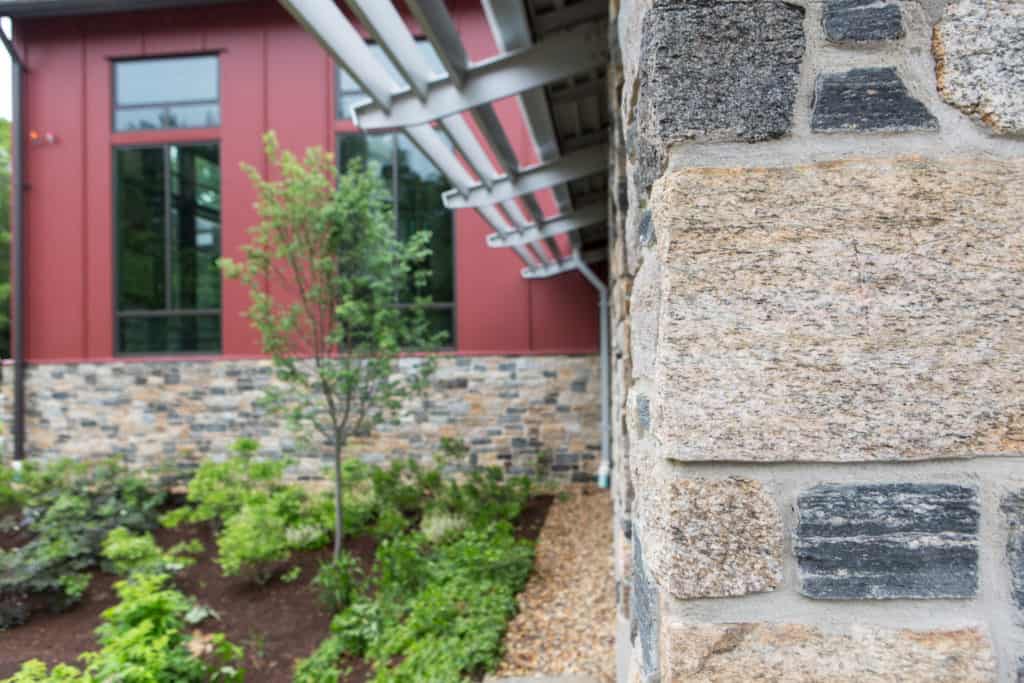
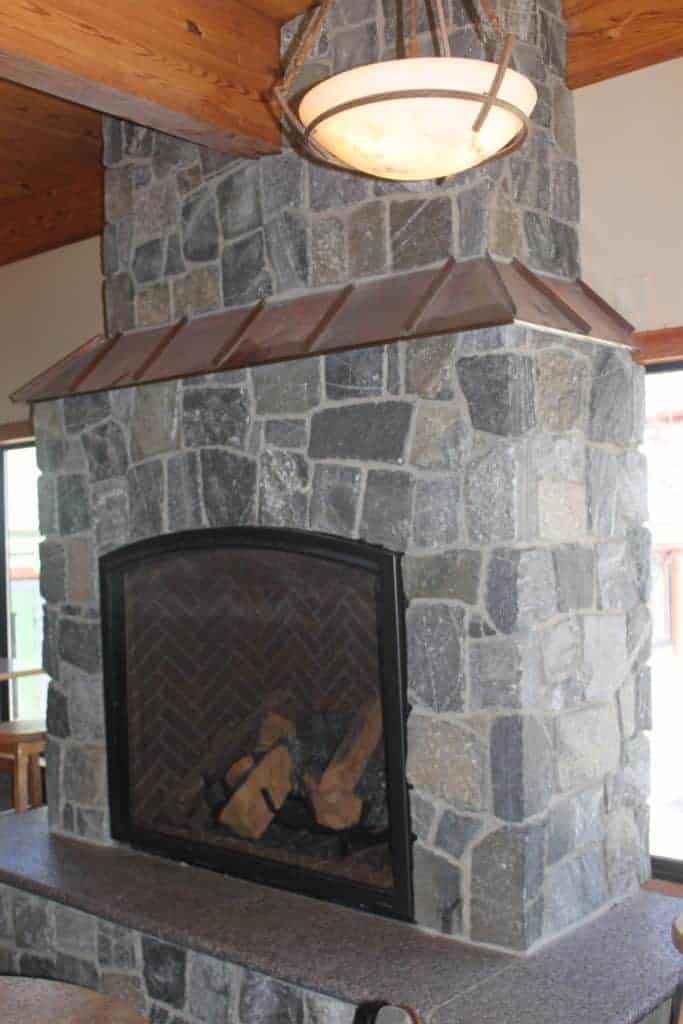
One way to install natural stone is to dry fit the pieces together and show no grout between the pieces. This installation technique will require the most trimming and material waste. Some shapes and colors may have a higher waste factor than others. This look is popular on interior applications and especially with the Ledgestone and Ashlar shaped products.
Stoneyard miter cut corner ledge flats Stoneyard Boston Blend Ledgestone on Cape Cod Home by Petes Masonry Stoneyard Greenwich Gray Ledgestone Belmont Country Club Stoneyard Boston Blend Ledge & Ashlar Copper Door Restaurant Stoneyard Boston Blend Ledgestone European Style Home in Sag Harbor Stoneyard Boston Blend Ledgestone and Mosaic Dry Fit Thin Stone Siding Stoneyard Boston Blend Ledgestone and Mosaic Dry Fit Thin Stone Siding Stoneyard Colonial Tan Ashlar Bonefish Grill Restaurant Stoneyard Colonial Tan Ashlar Bonefish Grill Restaurant Stoneyard Colonial Tan Ashlar Bonefish Grill Restaurant 2 | Standard grout joints – Concave
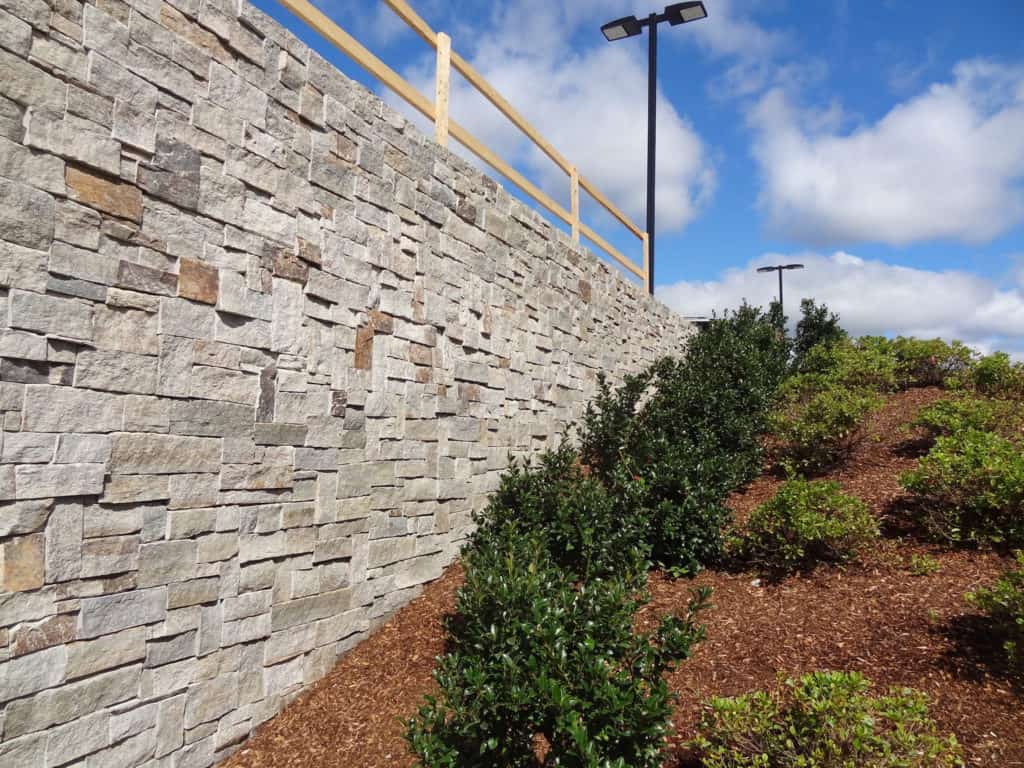
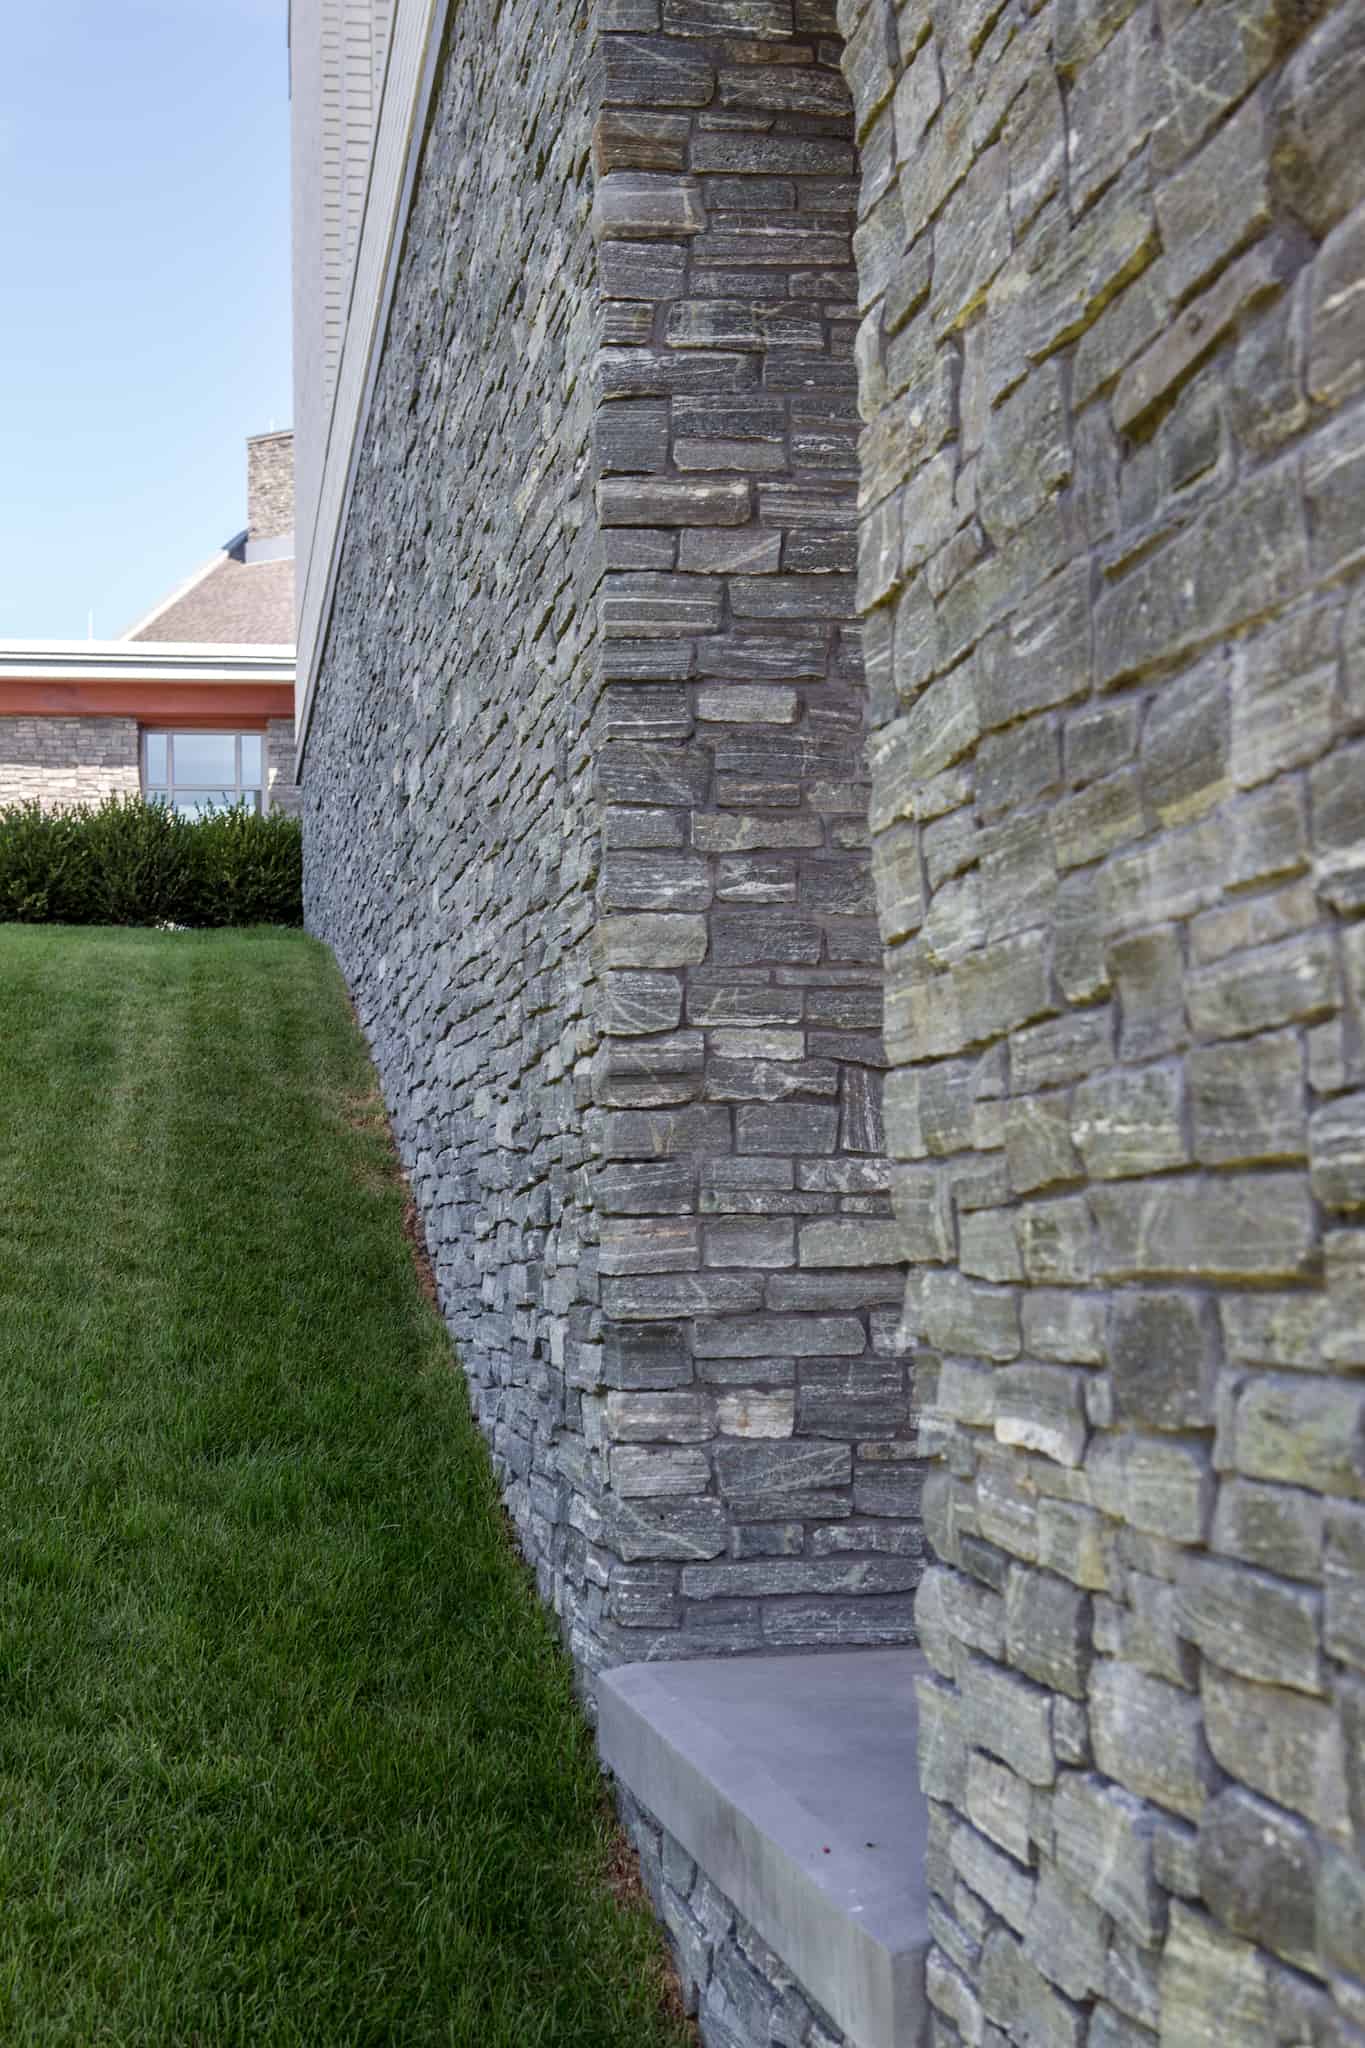
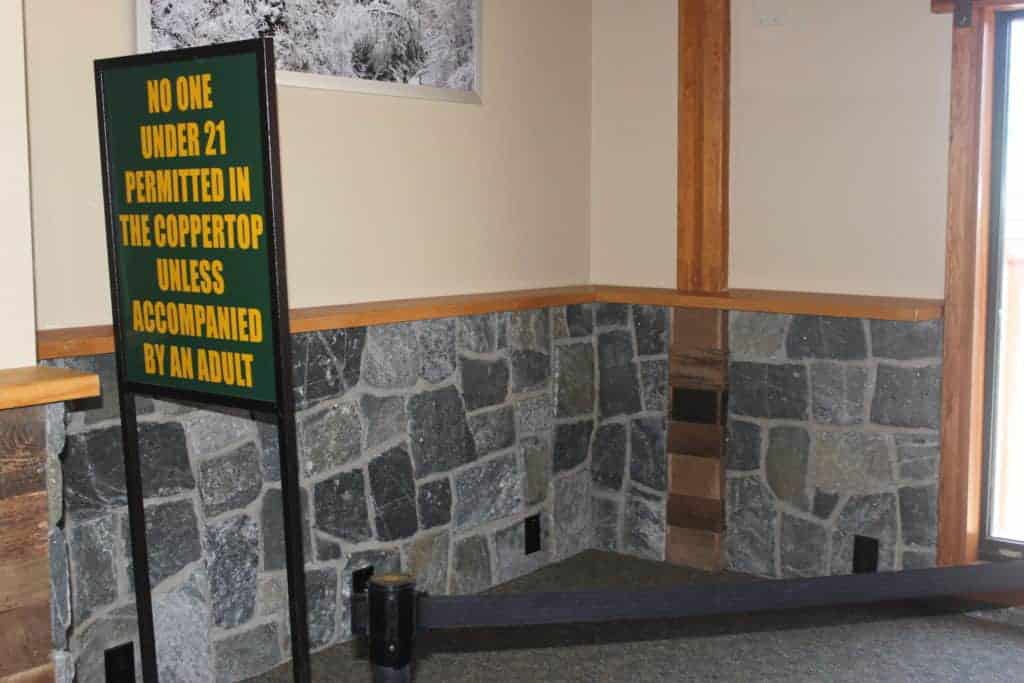
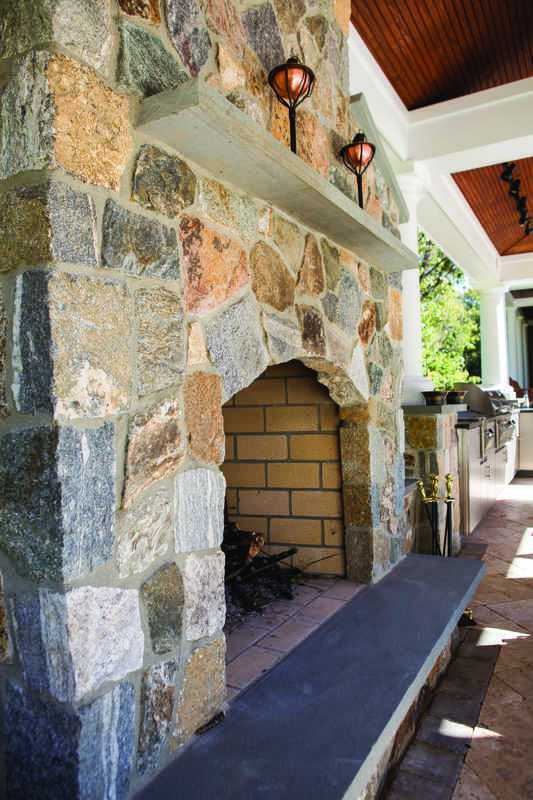
Typical interior joint thickness: 1/4″ – 3/8″ | Typical exterior joint size: 3/4″ – 1 1/2″ 1/4 inch joint allows some leeway for a little less trimming, while maintaining a tight fit stone look. Typically the mortar is recessed approximately 1/4 inch from the stone face or it can be flush to face. It adds just enough to make it a little easier to accept irregularities in pieces of natural stone. It can also be a nice mix where it is not too modern, but not too rustic. This installation is most commonly used when installing the Mosaic and Square & Rectangular shapes. The amount of trimming/shaping required is moderate.
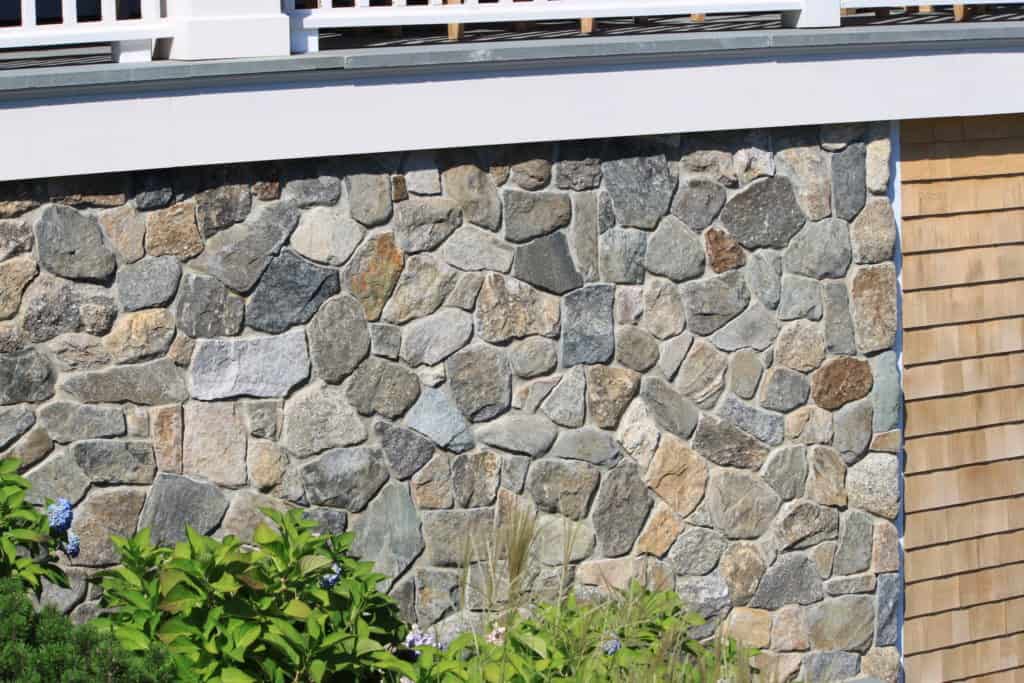
Stoneyard recessed window using corners Stoneyard keystones using corners Stoneyard Boston Blend Ashlar Smuttynose Brewery Stoneyard Boston Blend Mosaic and Square & Rec Rustic Luxury Home TRBSTB Bluestone Thermal Blue Tread Steps Stoneyard Boston Blend Mosaic and Round Tedesco Country Club 3 | Face Over Grout / Wide Joints
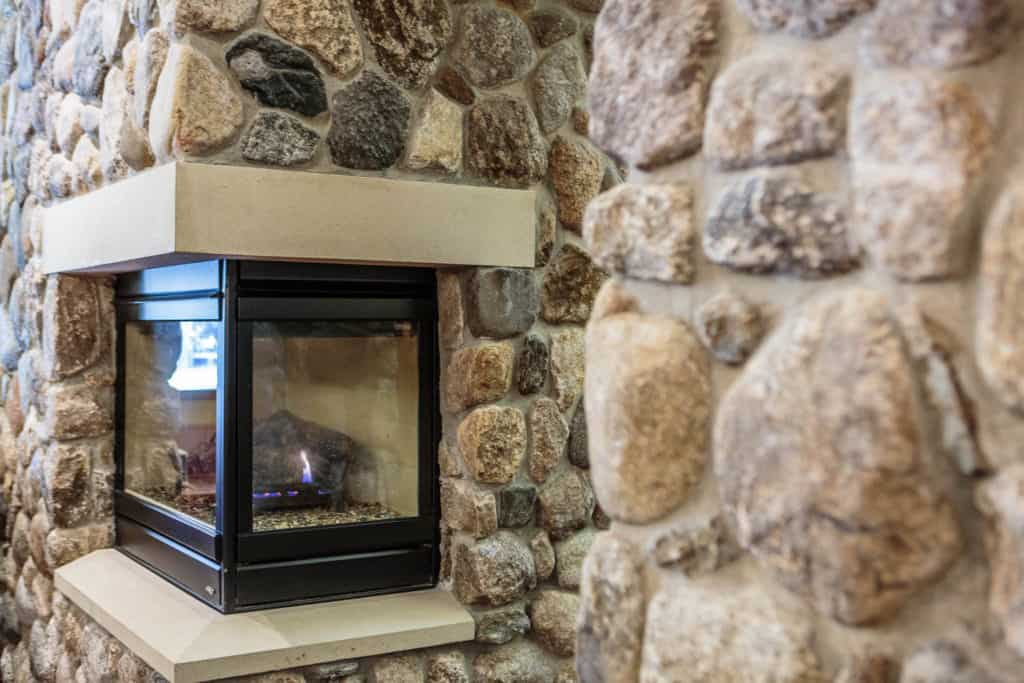
Face over grout is when the mortar/grout goes over some of the stone. This can be decorative or brushed over. A wide joint is when the stones are spaced over 1″ apart and the mortar is predominant in the installation. Typically seen in historic stone installations. Round and mosaic are the most popular shapes for this installation. This installation technique requires the least amount of trimming and yields the lowest waste factor.
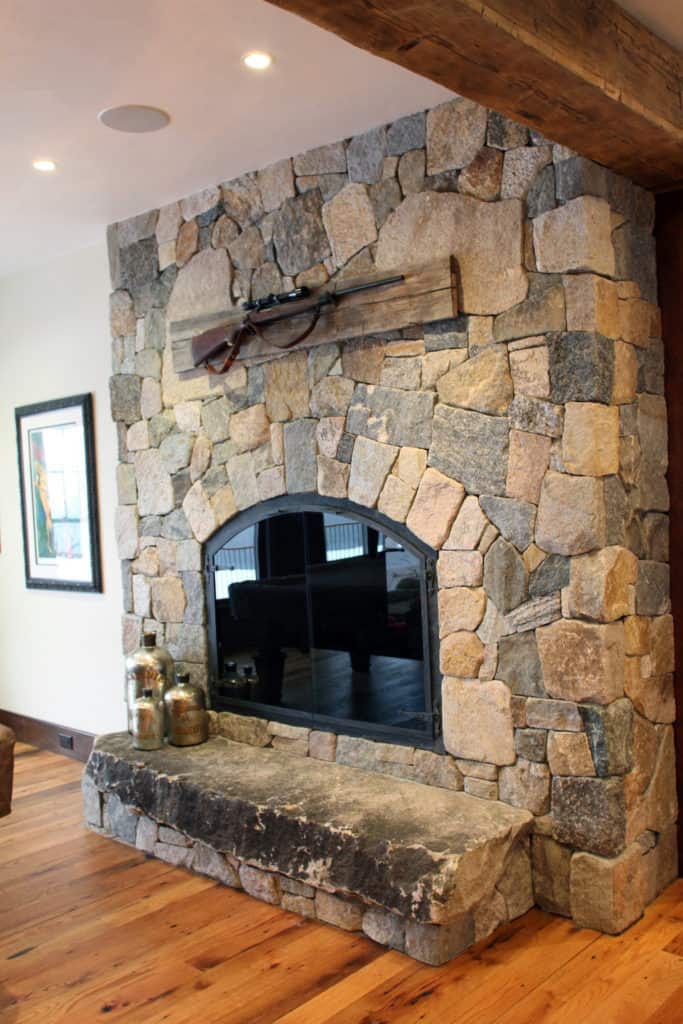
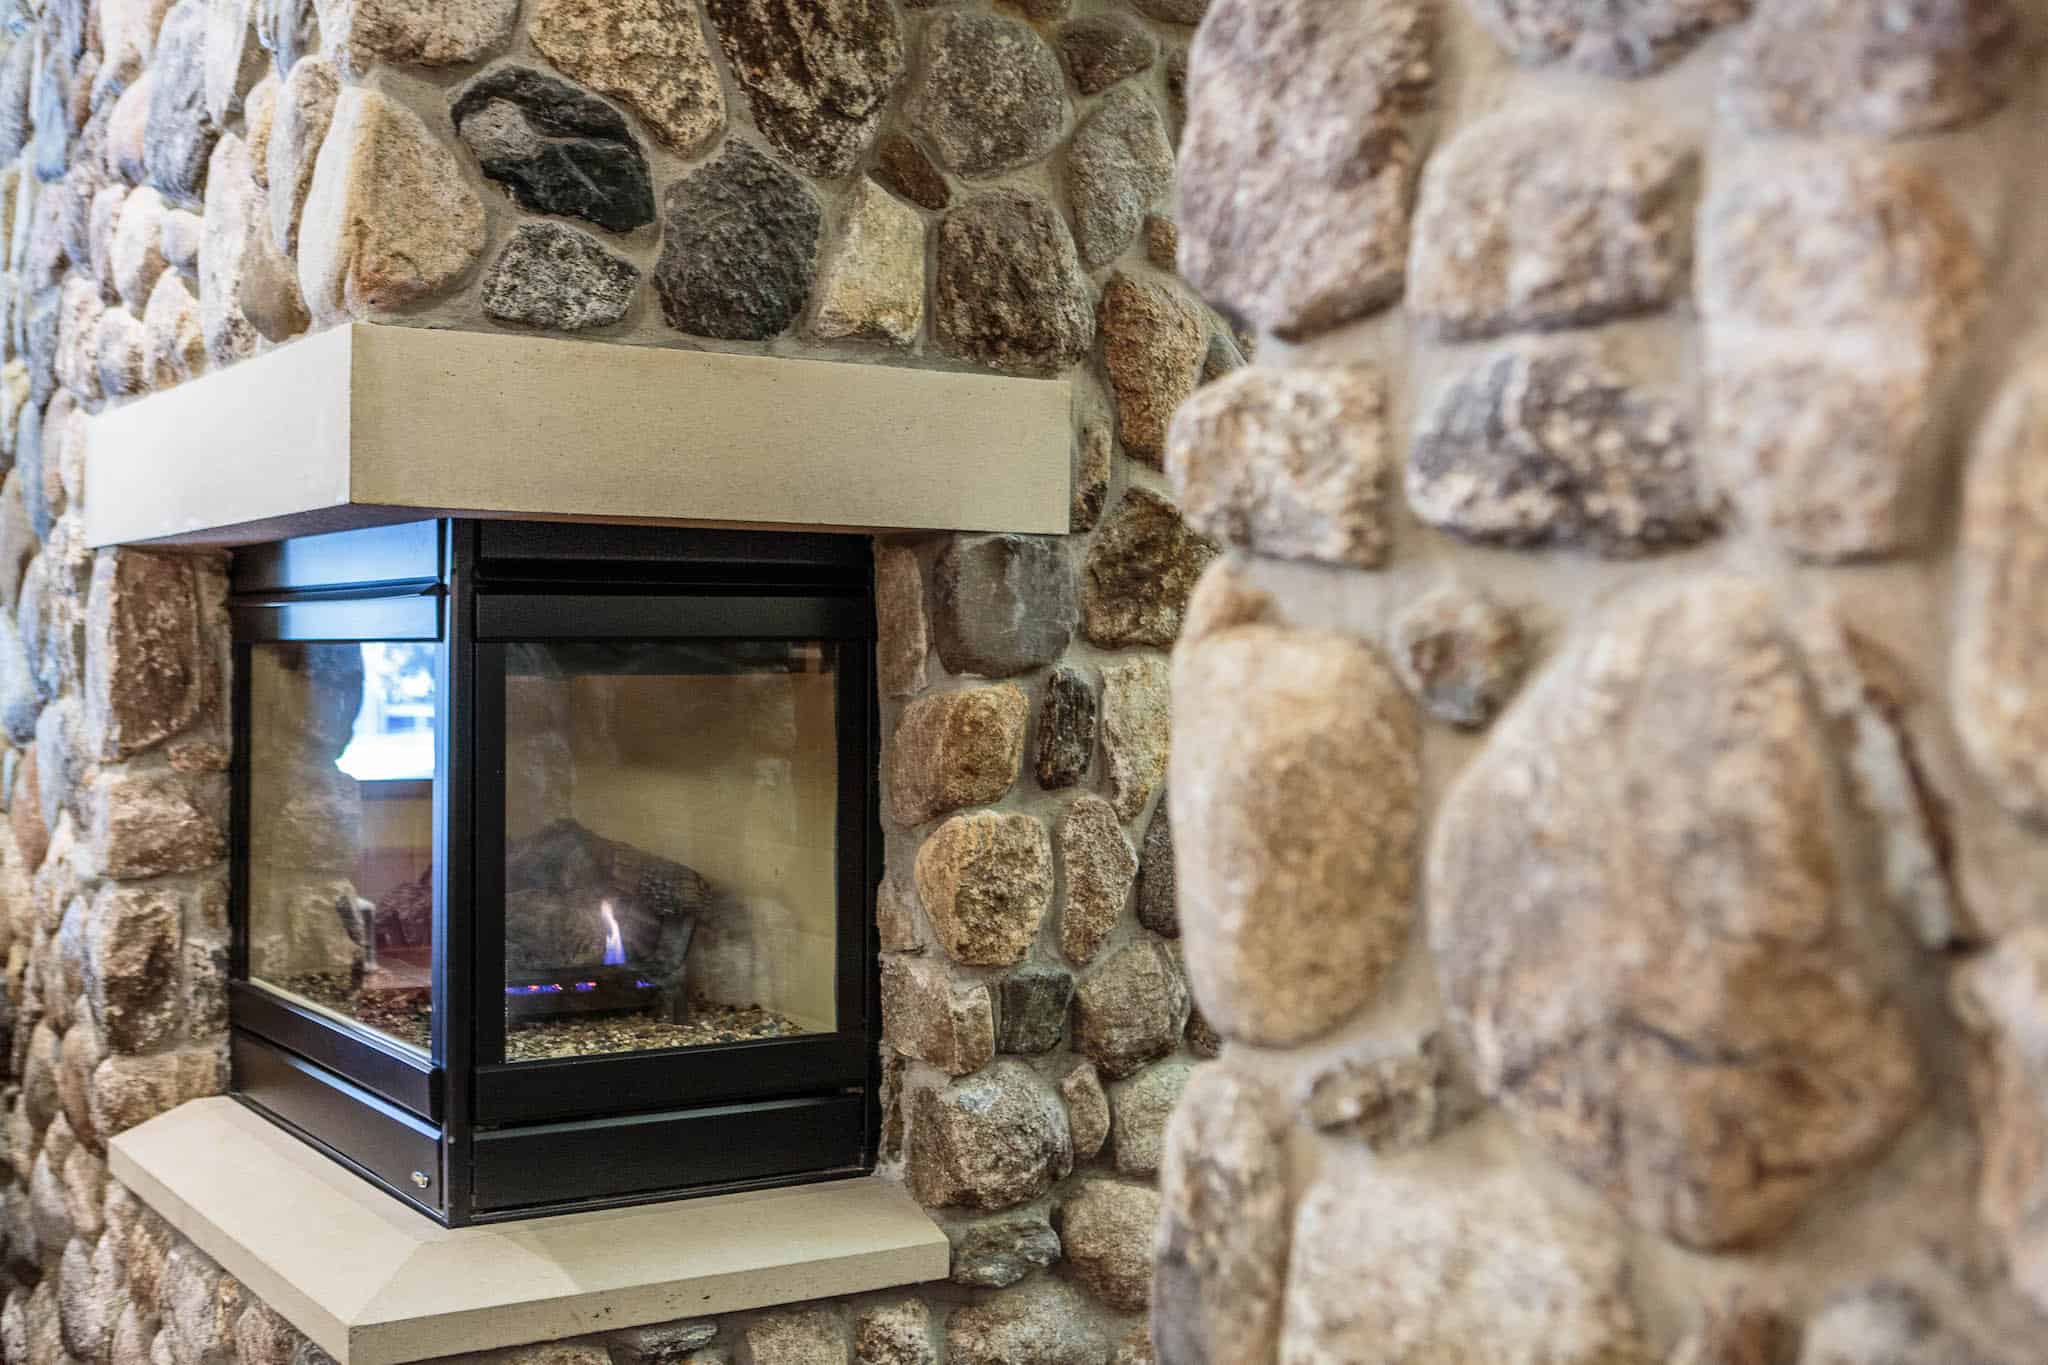
Stoneyard close 45 corner Boston Blend Mosaic Small Stoneyard Greenwich Gray Square & Rec Coppertop Lounge, Wachusett Mountain Ski Resort Stoneyard Greenwich Gray Square & Rec Coppertop Lounge, Wachusett Mountain Ski Resort Stoneyard Boston Blend Round Curry College Student Center Stoneyard Boston Blend Round Curry College Student Center VTMF Boston Blend Mosaic Fireplace Stoneyard Boston Blend Round Pool and Outdoor Living Area
VIDEO
Tips and Suggestions
Joints should be as consistent or uniform as possible. The project may have different colored pointing mortar which can also affect the look. The pointing mortar you can choose from a variety of colors from light gray to black will need to be decided based on the stone. A mock-up is important before starting a project to finalize all of these details. A mason will make a panel (3’x4′ in size) installing the material based on the specifications you requested. You can then make changes and decide if this is what you would want your installation to look like or if you would like to make any changes. Once approved, the mason will use it as a guide while installing. When they have questions they can fall back on that for a guide.
Joints should be as consistent and uniform as possible
Colored mortar is available
Mock-ups are always recommended
Larger projects (2,500 SF+) may have lower waste factors. Smaller jobs (under 2,500 SF) may have much higher waste factors than listed above.
How to Calculate Your Waste Factor
Natural stone installation requires masonry techniques such as cutting, splitting, sorting, and trimming stones to fit the desired finished area. The amount of stone cut and/or trimmed during the installation process is referred to as the “waste factor”. The amount of waste per job is dependent on the project requirements including how tight the finished joints are desired to be. Tighter joints require more trimming which generates more waste. A higher waste factor requires more stone to be consumed.
For example, lets say you are looking to cover an area that is 100 ft x 10 ft (1,000 SF). Based on your mock up, you are expecting a 30% waste factor. This means that you will need to purchase 1,300 SF (1,000 SF + (1,000 SF x 30%) ) of material in order to cover the desired area.